
Looking for Applesauce: How to make applesauce, easily! (home canning with simple directions, recipe, and with photos for each step) in 2025? Scroll down this page and follow the links. And if you bring home some fruit or vegetables and want to can, freeze, make jam, salsa or pickles, see this page for simple, reliable, illustrated canning, freezing or preserving directions. There are plenty of other related resources, click on the resources dropdown above. If you are having a hard time finding canning lids, I've used these, and they're a great price & ship in 2 days.
If you have questions or feedback, please let me know! There are affiliate links on this page. Read our disclosure policy to learn more.
Applesauce: How to make applesauce, easily! (home canning with simple directions, recipe, and with photos for each step)
 How to Make
Homemade Applesauce
How to Make
Homemade Applesauce
You think making and canning your own homemade
applesauce is difficult or expensive? Not at all!
Here's how to do it, complete instructions in easy steps
and completely illustrated. The applesauce will taste
much, MUCH better than anything you've ever had from a
store, and by selecting the right apples, it will be so
naturally-sweet that you won't need to add any sugar at
all. Plus, there is no need for any additives,
preservatives or chemicals.
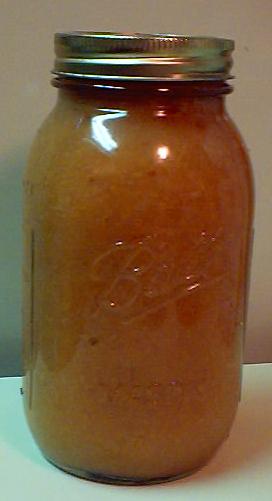
Prepared this way, the applesauce jars have a shelf life at room temperature of 2 to 3 years, and require no special attention. And of course, you can freeze the applesauce instead (it keeps indefinitely in a good freezer).
I learned years ago how to make jam and applesauce watching my mother and grandmother when I was a child. My grandmother and mother always made it, and now if I want it, I've got to make it myself (funny how that growing up stuff works?)
UPDATE for Fall 2023: the apple crop is a bit early this year due to the hoot summer, so get your apples before late October (see this page for apple picking details), Prices are WAY up and supplies appear to be reduced. I. Advice: check our apple varieties chart to see when your favorite varieties will be ripe, and call your local orchard to confirm, so you don't miss them! Prices (in my area) range from $40 to $80 per bushel. Yes, that is INSANE. Prices since 2021 have skyrocketed!
And here's how you can (or in the UK, "bottle") it too. If you don't want to can the applesauce, but just want some fresh for a meal; or you don't have any food mill, food sieve, etc. see how to make applesauce for a meal (not bottling it) with NO special equipment. And once you've made the apple sauce, why not take some of it and make apple butter? You can even make sugar-free apple butter! If you'd rather make pear sauce, see this page! Finally, if you want to make chunky applesauce, see this page.
Directions for Making Applesauce
Ingredients
- Apples (see step 1)
- Cinnamon
Equipment
- Jar grabber (to pick up the hot jars)
- Lid lifter (I like the lid rack that holds 12 lids or you can pull them out one at a time with the lid-lifter that has a magnet from the almost-boiling water where you sanitize them. ($4 at mall kitchen stores and local "big box" stores, but it's usually cheaper online from our affiliates)
- Jar funnel ($4 at mall kitchen stores and local "big box" stores, but it's usually cheaper online from our affiliates)
- At least 1 large pot (at least 8-quart size or larger)
- Large spoons and ladles,
- Canning jars (often called Ball jars, Mason jars or Kerr jars) (Publix, Kroger, other grocery stores and some "big box" stores carry them - now about $12 per dozen quart jars (up 50% in 2 years!) including the lids and rings)
- 1 water bath canner (a huge pot with a lifting rack to sanitize the jars of applesauce after filling (about $30 to $35 at mall kitchen stores and local "big box" stores, but it's usually cheaper online from our affiliates) You CAN use a large pot instead, but the canners are deeper, and have a rack top make lifting the jars out easier. If you plan on canning every year, they're worth the investment.
- Sieve:
- KitchenAid with the Sieve/grinder attachments ($370) OR
- a Foley Food Mill ($25) OR
- if you are REALLY into a tedious, time-consuming method, a simple metal sieve.
Recipe and Directions
 Step
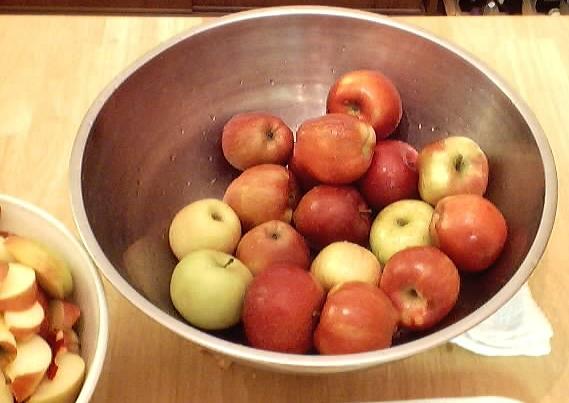
1 - Selecting the apples
Step
1 - Selecting the apples
The most important step! You need apples that are sweet - NOT something like Granny Smith's. Yeah, I know you like them (why do sweet women like sour apples???) and even if I did, they still wouldn't make good applesauce - you'd have to add a lot of sugar.
Instead, choose apples that are naturally sweet, like Red Delicious, Gala, Fuji, Winesap, McIntosh, Yellow Delicious, Mutsu and always use a mixture - never just one type. This year (2025) I used a mixture of Fuji (40%), Gala (35%), Red Delicious (20%) and Yellow Delicious (5%). If I could have found some Stayman Winesap, McIntosh or Cameo, I would have added them, too. It was so sweet I did not need to add any sugar at all. And the flavor is great! The Fuji's and Gala's give it an aromatic flavor! Honeycrisp and Pink Lady are also excellent, sweet, flavorful apples (but a bit watery).
"Seconds", "Culls" and "Drops"
Another important tip at orchards is to ask for "seconds", "culls" or "drops". These are smaller apples, sometimes odd shapes or with imperfect appearance. But there're perfect for applesauce and apple butter and uses cost 1/3 to 1/2 the price of the top grade apples. They're usually kept in the back, so you will have to ask for them. They also go quickly, so you may want to call ahead in the day to have some set aside for you. Not all orchards offer "seconds", nut they're a bargain when you can get them!
Step 2 - How many apples and where to get them
You can pick your own, or buy them at the grocery store. But for large quantities, you will find that real* farmer's markets, like the Farmer's Market in Forest Park, Georgia have them at the best prices. Last year, they were available from late September at $15 to $24 per bushel. Prices this year have been in the $18 to $30 range, most were $25/bushel at the real farmer's markets, like the Atlanta-Forest park Georgia State Farmer's Market and orchards in the southeast of the U.S. Weather and crop conditions affect the prices greatly from year to year.
You will get about 12 to 16 quarts of applesauce per bushel of apples. Count on 12 or 13 quarts per bushel.
* - not the cutesy, fake farmer's markets that are just warehouse grocery stores that call themselves farmer's markets.
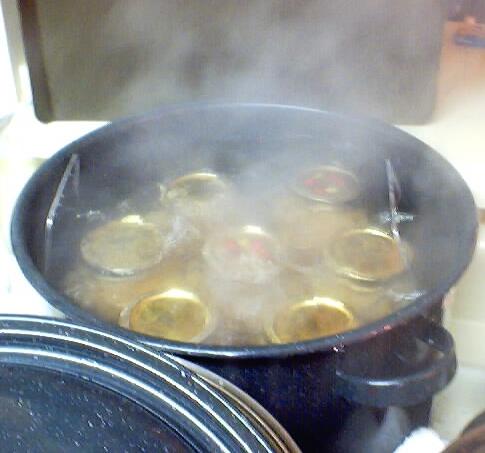
 Step
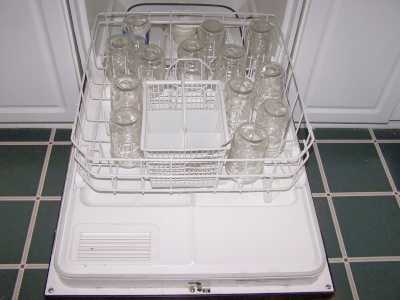
3 - Wash the jars and lids
Step
3 - Wash the jars and lids
Now's a good time to get the jars ready, so you won't be rushed later. The dishwasher is fine for the jars; especially if it has a "sanitize" cycle, the water bath processing will sanitize them as well as the contents! If you don't have a dishwasher with a sanitize cycle, you can wash the containers in hot, soapy water and rinse, then sanitize the jars by boiling them 10 minutes, and keep the jars in hot water until they are used. Leave the jars in the dishwasher on "heated dry" until you are ready to use them. Keeping them hot will prevent the jars from breaking when you fill them with the hot applesauce.
Put the lids into a pan of hot, but not quite boiling water (that's what the manufacturer's recommend) for 10 minutes, and use the magnetic "lid lifter wand" to pull them out.
 Step
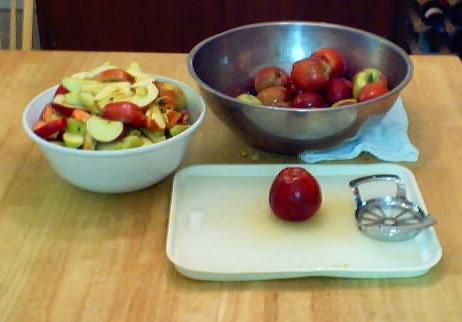
4 -Wash and chop the apples!
Step
4 -Wash and chop the apples!
I'm sure you can figure out how to wash the apples in plain cold water.
Chopping them is much faster if you use one of those apple corer/segmenters - you just push it down on an apple and it cuts it into segments. Note: You do not peel the apples! You will put the entire apple into the pot to cook.
 Step
5 - Cook the Apples
Step
5 - Cook the Apples
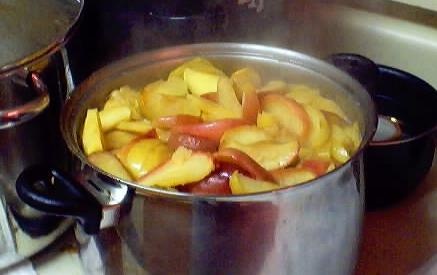
Pretty simple put about 1 inch of water (I used either filtered tap
water or store brand apple juice) on the bottom of a huge, thick-bottome d
pot. Put the lid on, and the heat on high. When it gets really
going, turn it to medium high until the apples are soft through and
through.
d
pot. Put the lid on, and the heat on high. When it gets really
going, turn it to medium high until the apples are soft through and
through.
NOTE: if there is a lot of standing water (juice) among the cooked apples, you may want to ladle it off before you sieve the applesauce, or your applesauce may be too watery. Be sure to save and refrigerate the juice - that is tasty natural apple juice! You can use it to cook the next batch of cut apples, or drink it!
Step 6 - Sieve the cooked apples
There are several ways to squish the apples through a sieve, either through a :
- hand-cranked Foley food mill (about $30 see this page or
- A Villaware, Roma or Oxo strainer (about $60, see further down the page) or
- through a KitchenAid sieve/grinder (with the attachments, about $300, but it lasts a lifetime and is fast and easy to use - I can make 100 quart jars per day with one of these).
See here for related tools, equipment, supplies on Amazon
See here for related tools, equipment, supplies on Amazon
See here for related tools, equipment, supplies on Amazon
See here for related tools, equipment, supplies on Amazon
See here for related tools, equipment, supplies on Amazon
See here for related tools, equipment, supplies on Amazon
See here for related tools, equipment, supplies on Amazon
I found a pretty good deal (about half price) on remanufactured KitchenAid's with a 1 year warranty - see the links above.
You CAN also use a simple metal sieve, but it will be VERY tedious, hard work - if you plan on making applesauce every year, spring for the 25 bucks for the food mill.
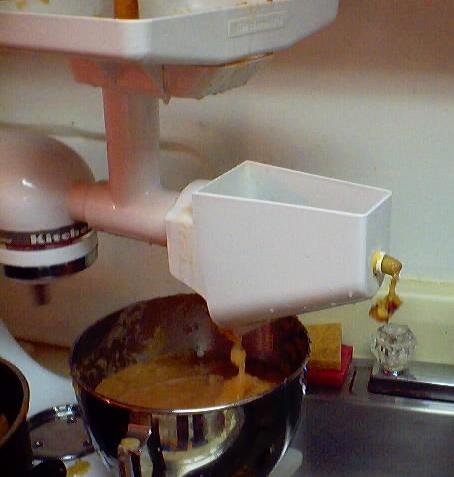
Basically, you put the cooked apples (including the skins, seeds, cores and stems) into the top hopper, and use the wooden plunger to push it in.
NOTE for those on a VERY tight budget or making just a small batch of applesauce
 You
CAN make applesauce without a food processor or a $25 food mill, but it's
much more work, and really only suitable for making a quart or two of
applesauce at a time... but it can be done - click here for the directions on making applesauce with NO special
equipment
You
CAN make applesauce without a food processor or a $25 food mill, but it's
much more work, and really only suitable for making a quart or two of
applesauce at a time... but it can be done - click here for the directions on making applesauce with NO special
equipment
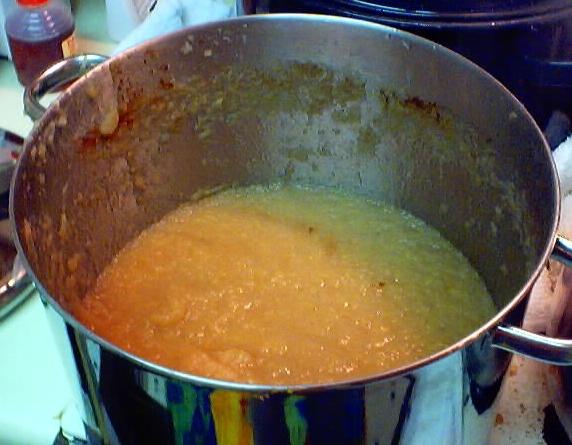
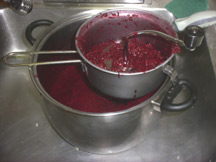
The device pushes it against a sieve and the applesauce comes
out underneath (in the chrome pot in the photo at left
), and the debris shoots out the side into the sink -
see photo below.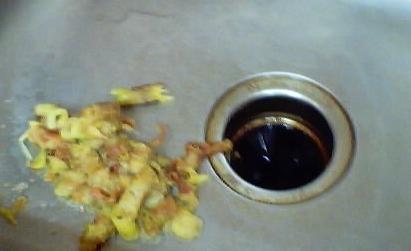
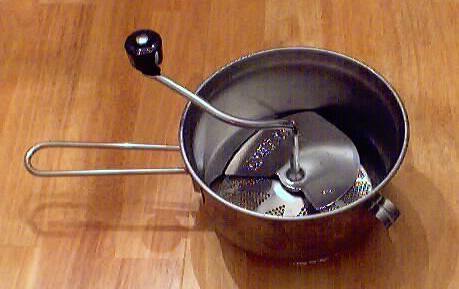
If
the idea of shelling out about $200 for KitchenAid,
plus the additional $120 for the grinder / sieve
attachment doesn't appeal to you, you can still make
applesauce using a Foley Food Mill, pictured at right.
You can order one here for much less than I've seen them
elsewhere (see the link below the picture at right and
click for more info). Obviously, you have to crank it by
hand, which is ok if you have child labor and aren't
making a lot. If you are only making a dozen or two
jars or don't have other uses for a KitchenAid, then
this is a practical alternative.
There is also a VERY nice, versatile strainer pictured at far right! Click on the links there or see the bottom of this page for more information and to order! The model on the far right with the feed hopper can handle higher volumes than a Foley food mill (without giving you cramps!)
See here for related tools, equipment, supplies on Amazon See here for related tools, equipment, supplies on Amazon See here for related tools, equipment, supplies on Amazon To see a greater variety of strainers in other types, sizes, and prices, click here!
 Step
7 - Season and keep the applesauce hot
Step
7 - Season and keep the applesauce hot
Put the applesauce into a large pot. Add cinnamon to taste. You should not need to add any sugar.
The applesauce does not need any further cooking; just keep it hot until you get enough made to fill the jars you will put into the canner (Canners hold seven jars at once, whether they are quart or pint size)
 Step
8 - Fill the jars and process them in the water bath
Step
8 - Fill the jars and process them in the water bath
Fill them to within 1/4-inch of the top, wipe any
spilled applesauce of the top, seat the lid and gently tighten the ring
around them. Put them in the canner and keep them covered with at
least 1 inch of water. Get the canner back to a full boil and begin
timing. If you are at sea level (up to 1,000 ft) boil pint jars for 15
minutes and quart jars for 20 min. If you are at an altitude of 1,000 feet
or more, see the chart below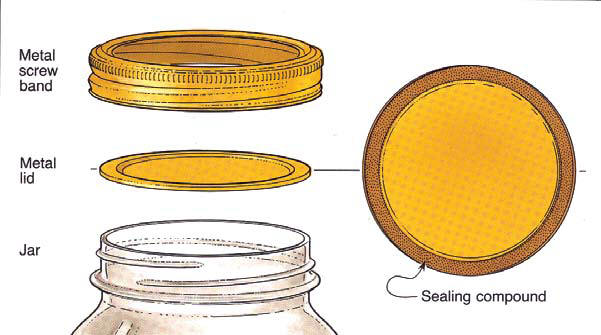
.
|
Recommended process
time for applesauce in a |
||||
| Process Time at Altitudes of | ||||
| Quart Size | 0 - 1,000 ft | 1,001 - 3,000 ft | 3,001 - 6,000 ft | Above 6,000 ft |
| Pints | 15 min | 20 | 20 | 25 |
| Quarts | 20 | 25 | 30 | 35 |
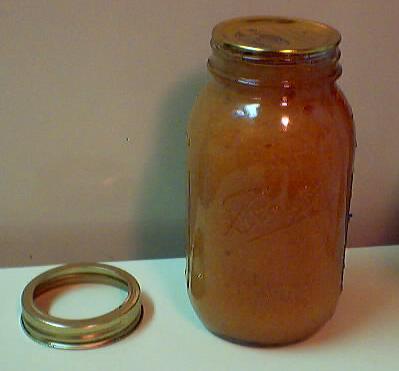 Step
9 - Remove and cool the jars - Done
Step
9 - Remove and cool the jars - Done
Lift
the jars out of the water and let them cool without touching or bumping
them in a draft-free place (usually takes overnight) You can then
remove the rings if you like, but if you leave them on, at least loosen
them quite a bit, so they don't rust in place due to trapped moisture.
Once the jars are cool, you can check that they are sealed verifying
that the lid has been sucked down. Just press in the center, gently,
with your finger. If it pops up and down (often making a popping sound),
it is not sealed. If you put the jar in the refrigerator right away, you
can still use it. Some people replace the lid and reprocess the jar,
then that's a bit iffy. If you heat the contents back up, re-jar them
(with a new lid) and the full time in the canner, it's usually ok.
Other Equipment:
|
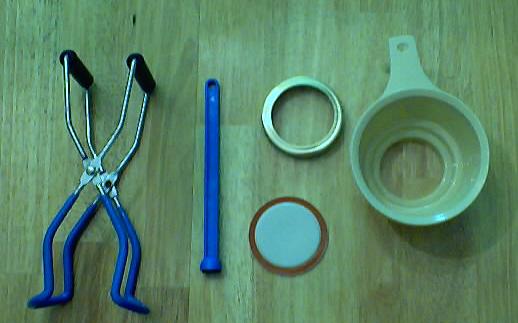
From left to right:
|
Canning Supplies Starter Kit - Canning Jar Lifter, Canning funnel, Scissor Tongs, more |
 |
Summary - Cost of Making Homemade Applesauce - makes 14 quarts* |
||||
| Item | Quantity | Cost in 2025 | Source | Subtotal |
| apples | 1 bushel (about 42 lbs) |
Depends on the apples you choose: as low as $15/bushel for "seconds" to $60/bushel for Fuji's at a farm market. A good average price is $30/bushel | Pick your own | $30.00 |
| Canning jars (quart size), includes lids and rings | 14 jars | $14.00/dozen quart jars | Grocery stores, like Public, Kroger, Safeway and sometimes, Big Lots, local hardware stores and big box stores | $16.00 |
| Cinnamon | 1 tablespoon | $0.50 | Grocery stores, like Public, Kroger, Safeway and sometimes, Big Lots, local hardware stores and big box stores | $0.50 |
| Total | $46.50 total or about $3.32 per quart jar (including the jars - or $2.25 per quart if you already have the jars and just buy new lids) and as low as 75 cents per jar if you use "seconds" apples and have reuse your jars! |
|||
| * - This assumes you already have the pots, pans, ladles,, and reusable equipment. Note that you can reuse the jars! Many products are sold in jars that will take the lids and rings for canning. For example, Classico Spaghetti sauce is in quart sized jars that work with Ball and Kerr lids and rings- some authorities do not recommend these, saying they are more prone to break, and while I have found that is true of mayonnaise jars, I have found the Classico spaghetti jars to be pretty sturdy. | ||||
FAQs - Questions and Answers About Making Applesauce
Q. Can I use a JuiceMan or Vitamix instead of the grinder/sieve? The Juiceman will 'spit out' the pulp and seeds, but the Vitamix uses everything. This is my first time making applesauce and I really don't want to mess it all up.
A. It sounds like the Vitamax isn't appropriate: I'm not sure many people want to eat ground up stems and cores. In my humble opinion, that's carrying "eat some fiber" to an extreme! :) And it would mostly likely adversely affect the taste, plus the seeds contain small amounts of cyanide (see this page for more information.)
The Juiceman might work. If it ejects the seeds, stems and hard parts of the core, while allowing the edible apple pulp to pass through, that's what you want.
Since it appears to be designed to "juice" fruit, the applesauce might be ultra-smooth; which could be either a positive or a negative, depending upon your preferences.
Finally, the inclusion of skins in the final product is debatable. The naturalists (hmm, and frugal folks, too) will argue that the skins could and should be ground up and included, as that increases the yield of the applesauce and that's "where the nutrition is" (a statement that I haven't yet seen from credible source, like a major university food science lab). Of course, if any fungicides or pesticides are used, they concentrate in the skin (remember the controversy over Alar?)
If the apples are grown without the use of pesticides or fungicides, then the only concern is the taste, but who knows, you may prefer it with the skins ground in. You don't know till you try!
Q. Can I use a blender for making apple sauce instead of a food mill or food processor?
Certainly! Of course, you will need to peel, cut, core and manually remove the seeds first, before you cook the apples; unless you want them all blended up into the applesauce. I get letters from people say they prefer it that way. I think I'll keep using the strainer. But sure, aside from the extra work in preparation , you can use the blender.
Q. I was wondering if the applesauce recipe could be frozen and then used?
Yes, absolutely! There's not much difference in flavor, applesauce cans very well, so most people can it rather than freeze, because of space limitations in their freezer. In a good deep freeze, it should easily last a year. Just let it cool to room temperature, pour it into Ziploc bags or other suitable freezer containers and pop it in the freezer! That's all there is to it!
Q. I have a question about canning applesauce. Some of mine bubbled over
in the canner.
The lids made a good seal, however. I wanted to know if I can
consider these canned or do I have to keep them in the fridge?
Since they sealed and they were processed in the water bath, they should be fine! It sounds like the jars were filled too full (not enough headspace) or allowed to cool between filling and putting them in the hot water bath.
Q. Have you heard of strawberry-applesauce? Can it be "canned" at home?
Yes, I have made it fresh. I have not found a lab-tested USDA or University sanctioned recipe for strawberry applesauce, but since both strawberries and apples are acidic, safe to can in a water bath canner, high sugar, and pureed, I'd have to believe that a mix of the two would be equally safe. Understand, this is just my layman's estimation, not based on a lab test. If I were to can it, I'd use the recipe above and simply replace and 20% of the apples with strawberries, adding the hulled whole strawberries in with the chopped apples in step 5.
Q. I made and water bathed my applesauce about 3 weeks ago. Did everything that I was told to do. But, my applesauce is turning kind of brown on the very top of the bottle. Is this a problem?"
Not at all; that's fairly normal. It's just a bit of surface oxidation. It usually only discolors the top 1/4 inch or so of applesauce. It's harmless and won't affect the taste. Next year, just leave a little bit less headspace, make sure your water bath is really boiling hard, and if it bothers you, sprinkle a little bit of "Fruit Fresh" (available at most grocery stores; it's a citric acid/ascorbic acid mix) on the top of each jar, after you fill it, but (obviously) before you put the lids on.
Q. Hello, I made applesauce and canned for the very first time last week. I put the boiling applesauce in the jars and sat the jars on the counter and they sealed on their own. I did not know I was suppose to use a water canner or pressure cooker. Now that I have done more research I know that I should have used a water canner. Is all of my applesauce fine since it all the lids sealed or should I be worried? '
Well, the USDA and universities will argue that it was not sterile, and is risky. The sealing was due merely to the cooling of expanded heated water, but is completely unrelated from any assurance of a sterile condition. I think you will find that the rate of spoilage could be high compared with water bath processed jars of applesauce.
The risk of botulism still exists. And since botulism spoilage has no taste, color, odor or gas, it is undetectable at home.
In short, I'm afraid that there is no answer without lab testing your jars. Some families routinely can without processing, but I don't think I'd take the risk. See this page for more information.
Q. Thickening runny applesauce: "I have been adding apples to a stockpot of applesauce that I have been making, today was the third time reheated and I was going to can it today and the sauce started becoming runnier and runnier. I have done this before without issues but used a different kind of apple. Have I ruined it for sauce now? Can it be salvaged for something else like apple butter if I have? There is 3 different types of apples in this batch
Well, thanks to the plentiful rainfall this year, most apples are a bit more watery than in past years. You could also be using apple varieties that are especially watery, like Honeycrisp, Pink lady, Gala. In that case, to get a thicker apple sauce. It sounds like you are not using a food mill or sieve, but are peeling and coring the apples and coking them directly into applesauce. You have a couple of options. You can either
1. core and peel a drier variety (like Fuji, Rome Beauty) and add that, or
2. peel, core and segment your apples, cook them (apart of the too-thin applesauce) until soft in a 1 inch of water. Then drain off the liquid and add the solids to your applesauce. The liquid makes good drinking apple juice.
Of course, cooking the unpeel chopped apples and then using the food mill gives you the ability to ladle off excess juice before your mush and sieve the apples. Foley food mills (see on the applesauce instructions page) are usually about $24 and well worth the investment.
And yes, you could always use the applesauce to make apple butter!
Comments and feedback
Here's what some visitors had to say:
- Thickening applesauce - A visitor writes on September 29, 2013: "I have just made another batch of applesauce following your instructions. I love it and it's so easy this way. I just wanted to pass on something that I do when running the cooked apples through my Kitchen Aid food mill. I actually take the discarded pulp and run it through again. It comes out really dry in the discard bowl and extremely thick in the apple sauce bowl. Then I stir that in with the rest of the apple sauce and it makes it thicker. I just thought you might find that useful.
- A visitor writes on July 03, 2013: "Just made your applesauce recipe (because I'm making your apple butter recipe tomorrow) and holy moley, it's the best applesauce I've ever had! So easy too! I'm going to have to buy a bunch more apples and make a ton of it for my kids to eat!"
- A visitor writes on October 18, 2012: "First, I would like to say I love the canning information you guys have on your site. Very informative and helpful. I came here looking for help with canning applesauce, but I've been really enjoying the depth and quality of your information. "
- A visitor writes on November 23, 2011: "I just wanted to tell you how much I have enjoyed your site. A few weeks ago, I was looking for a delish applesauce recipe and happened upon your site, which I had never visited before. Since then, your site had popped up in searches for several things and I am always tickled to see what you have to say. Today, for a homeschool "Thanksgiving" unit with my kids, we did several things with a pumpkin (guessed it's weight, then weighed it; guessed if it would float then put it in the pool to see...lol; etc) and finally roasted the seeds and "cooked" the pumpkin for puree...and so I found myself in need of a recipe for Pumpkin Bread...alas, your site came up yet again and I knew I was on the right track. I look forward to making the pumpkin bread tomorrow FOR Thanksgiving!! Thank you so much for what you do!!! "
Canning Books, Supplies and Accessories
These are my favorite essential canning tools, books and supplies. I've been using many of these for over 50 years of canning! The ones below on this page are just the sampling of. my preferred tools. but you can find much more detailed and extensive selections on the pages that are linked below.
- Strainers, pit removers, seed-skin-stem removers, jelly strainers, etc. All types, makes and prices (from $19 to $350)
- Selecting a KitchenAid mixer and attachments for home canning
- Vacuum Foodsealers for freezing, dried foods, and refrigerated foods - the FoodSaver line
- Cherry pitters reviews, prices and ordering
- Steam Juicers
- Food dehydrators - easy and fast to dry your own fruits, veggies, sun-dried tomatoes, etc.
The All New Ball Book Of Canning And Preserving: Over 350 of the Best Canned, Jammed, Pickled, and Preserved Recipes Paperback
This is THE book on canning! My grandmother used this book when I was a child.; It tells you in simple instructions how to can almost anything; complete with recipes for jam, jellies, pickles, sauces, canning vegetables, meats, etc.
If it can be canned, this book likely tells you how! Click on the link below for more information and / or to buy (no obligation to buy)The New Ball Blue Book of Canning and Preserving
Canning and Preserving for Dummies by Karen Ward
This is another popular canning book. Click here for more information, reviews, prices for Canning and Preserving For Dummies
Of course, you do not need to buy ANY canning book as I have about 500 canning, freezing, dehydrating and more recipes all online for free, just see Easy Home Canning Directions.
Home Canning Kits
See here for related tools, equipment, supplies on Amazon See here for related tools, equipment, supplies on Amazon
I have several canners, and my favorite is the stainless steel one at right. It is easy to clean and seems like it will last forever. Mine is 10 years old and looks like new.
The black ones are the same type of standard canner that my grandmother used to make everything from applesauce to jams and jellies to tomato and spaghetti sauce.
This complete kit includes everything you need and lasts for years: the canner, jar rack, Jar grabber tongs, lid lifting wand, a plastic funnel, labels, bubble freer, It's much cheaper than buying the items separately. It's only missing the bible of canning, the Ball Blue Book.
You will never need anything else except jars & lids (and the jars are reusable)!
The complete list of canners is on these pages:
- Water bath canners - Good for acidic foods, like applesauce, pickles, salsa, jams, jellies, most fruits
- Pressure canners - needed for low and non-acidic foods, like canned vegetables (corn, green beans, etc), and meats
- Canners for glass top stoves if you have a glass or ceramic stove
- Canners for induction stovetops

Pressure Canners
If you plan on canning non-acidic foods and low acid foods that are not pickled - this means: meats, seafood, soups, green beans corn, most vegetables, etc., then you ABSOLUTELY must use a Pressure Canner.
Of course, you can use a pressure canner as a water bath canner as well - just don't seal it up, so it does not pressurize. This means a Pressure Canner is a 2-in-1 device. With it, you can can almost ANYTHING.
There are also other supplies, accessories, tools and more canners, of different styles, makes and prices, click here!

Basic Canning Accessories
From left to right:
- Jar lifting tongs to pick up hot jars
- Lid lifter - to remove lids from the pot of boiling water (sterilizing )
- Lids- disposable - you may only use them once
- Ring - holds the lids on the jar until after the jars cool - then you remove them, save them and reuse them
- Canning Jar funnel - to fill the jars
Strainers
These are very useful for making sauces like applesauce, tomato sauce, spaghetti sauce, jellies, etc. Below are my favorites. The complete list is on these pages:
- Strainers, pit removers, seed-skin-stem removers, jelly strainers, etc. All types, makes and prices (from $19 to $350)
- Selecting a KitchenAid mixer and attachments for home canning
Inexpensive Old School Strainers: hand cranked Foley Food Mills
- The hand-cranked Foley food mill (see this page or clock the ad box) has been used for well over 100 years in homes all over America (and variants around the world). It is effective and inexpensive, and ideal for small batches. However, if you need to make many quarts, you will sure end up with tunnel carpel syndrome or some other repetitive strain injury.
Norpro 1951 Manual Food Strainer and other brand stariners, with optional motors; (almost identical to Victorio V250, Villaware and Roma models, all discontinued)
This is The next step up from the Foley food mill. First, it's far more ergonomic, and its handle is easier to use. Next, it works in continuous mode rather than batch mode. So you can do much larger volumes easily. Finally, It has an optional motor, so you can. remove the manual labor. It also offers many different size strainers to use for different types of berries, vegetables and fruit.
See the seller's website for more information, features, pricing and user reviews!
- A Johnny, Weston or Oxo strainer (about $60 - $100, see further down the page) or
- This trainer is. simply a more upscale and improved version of the one above.
- See this page for more information, reviews, descriptions of other strainers and supplies or to order!
KitchenAid - Best Large Volume Strainers
If you're going to do large volumes of fruit or vegetables , or do it year after year, then. you really should think about getting a higher end kitchen. utility device. Kitchen aids are the cream of the crop. Once you buy one of these, you keep at the rest of your life and it gets handed down to the next generation. . My sister is using one she inherited from my mother 25 years ago, who got it in the 1940s as a wedding gift. So, although the initial cost is high, they literally last for many lifetime. So the cost on an annual basis is pretty trivial, especially when you consider the cost of therapy and treatment for. the repetitive strain injuries you will get from manual cranking day after day. Add to that of course the cost of therapy for the emotional injuries you'll get from going insane, standing there hand cranking something for hours.
KitchenAid's with a sieve/grinder (with the attachments, costs about $400, but it lasts a lifetime and is fast and easy to use - I can make 100 quart jars of applesauce per day with one of these).
FREE Illustrated Canning, Freezing, Jam Instructions and Recipes
Don't spend money on books. that you don't need to. Almost everything you can find in some book sold online or in a store is on my website here for free. Start with theEasy Home Canning Directions below. That is a master list of canning directions which are all based upon the Ball Bblue book, the National Center for Home Food Preservation and other reputable lab tested recipes. Almost every recipe I present in addition to being lab tested com. is in a step by step format with photos for each step and complete. explanations. that tell you how to do it, where to get the supplies and pretty much everything you need to know. In addition, there almost always in a PDF format so you can print them out and use them while you cook.
[ Easy Home Canning Directions]
[FAQs - Answers to common questions and problems]
[Recommended books about home canning, jam making, drying and preserving!]


Looking for canning equipment and supplies?
Water bath canner with a jar rack
Pressure canners for gas, electric and induction stoves: Presto 23Qt or T-fal 22Qt
Canning scoop (this one is PERFECT)
Ball Blue book (most recent version)
Jars: 8oz canning jars for jams
Find Other types of farms:
Farm markets and roadside stands
Road trips and camping resources
Local Honey, apiaries, beekeepers
Consumer fraud and scams information
Home canning supplies at the best prices on the internet!
Maple Syrup Farms, sugarworks, maple syrup festivals
Environmental information and resources
Farms For Your Event for birthday parties, weddings, receptions, business meetings, retreats, etc.
Festivals - local fruit and vegetable festivals
Get the
most recent version of
the Ball Blue Book
