Looking for How to Make Homemade Pear Sauce in 2024? Scroll down this page and follow the links. And if you bring home some fruit or vegetables and want to can, freeze, make jam, salsa or pickles, see this page for simple, reliable, illustrated canning, freezing or preserving directions. There are plenty of other related resources, click on the resources dropdown above. If you are having a hard time finding canning lids, I've used these, and they're a great price & ship in 2 days.
If you have questions or feedback, please let me know! There are affiliate links on this page. Read our disclosure policy to learn more.
How to Make Homemade Pear Sauce
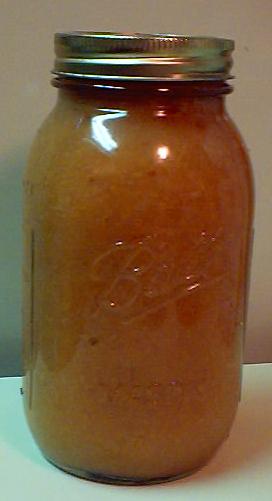
 How to Make Homemade Pear Sauce
Yield: 7 to 9 pint jars
Click here for a PDF print version
Making and canning your own pear sauce is quite easy; it's made exactly like applesauce. Pearsauce has a texture that is a bit more grainy and of course it has the pear flavor.. Here's how to do it, in 13 easy steps and completely illustrated. Essentially, pears cook much like apples. So almost anything you can make with apples, you can make with pears.Also, see our easy illustrated directions about how to can pears, pear picking tips, make pear or applesauce, pear or apple butter and our list of apple festivals! Andsee this page for descriptions of pear varieties
Ingredients
Yields about 8 or 9 jars, each 8 oz
- Any quantity of pears. it usually takes about 4 lbs per quart of pear sauce. see this page for descriptions of pear varieties
- Cinnamon (optional!) I like 1/2 teaspoon per batch
Equipment
- Jar grabber (to pick up the hot jars)
- Jar funnel ($4 at mall kitchen stores and local "big box" stores, but it's usually cheaper online from our affiliates)
- At least 1 large pot
- Large spoons and ladles,
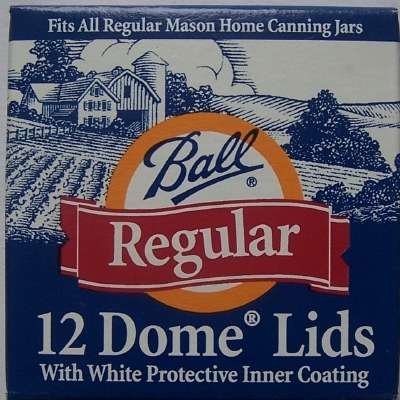
- Canning jars (often called Ball jars, Mason jars or Kerr jars) (Publix, Kroger, other grocery stores and some "big box" stores carry them - now about $12 per dozen quart jars (up 50% in 2 years!) including the lids and rings)
- 1 water bath canner (a huge pot with a lifting rack to sanitize the jars of pear jelly after filling (about $30 to $35 at mall kitchen stores and local "big box" stores, but it's usually cheaper online from our affiliates) You CAN use a large pot instead, but the canners are deeper, and have a rack top make lifting the jars out easier. If you plan on canning every year, they're worth the investment.
- Sieve:
- KitchenAid with the Sieve/grinder attachments ($200 to $300) OR
- a Foley Food Mill ($25) OR
- if you are REALLY into a tedious, time-consuming method, a simple metal sieve.
Recipe and Directions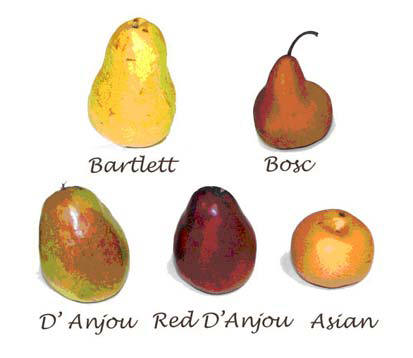
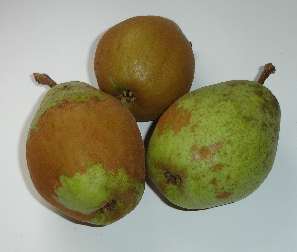
Step 1 - Selecting the pears
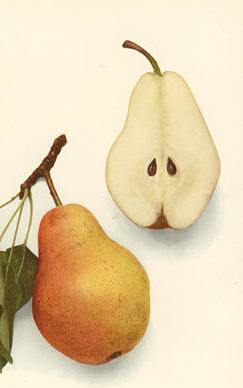 The most important step! You need
pears that are sweet if you want to cut down on the added sugar. Just
the sweetest pears you can get! Some of the common sweet varieties
are Bartlett, Bosc, D'Anjou and Asian pears.
The most important step! You need
pears that are sweet if you want to cut down on the added sugar. Just
the sweetest pears you can get! Some of the common sweet varieties
are Bartlett, Bosc, D'Anjou and Asian pears.
Step 2 - How many pears and where to get them
You can pick your own, or buy them at the grocery store. But for large quantities, you will find that real farmer's markets, like the State Farmer's Market in Forest Park, Georgia have them at the best prices. In 2007, they were available from late September at $12 to $20 per bushel.
You will get about 12 quarts of pear jelly per bushel of pears.
Step 3 -Wash the pears!
I'm sure you can figure out how to wash the pears in plain cold water and remove any stickers or labels on them.
Using a vegetable peeler or a paring knife, peel the pears. You do NOT need to peel, nor remove seeds or stems from the pears, unless you do not have a sieve. The sieves, see step 6, will remove all of these!
Step 4 -Chop the pears!
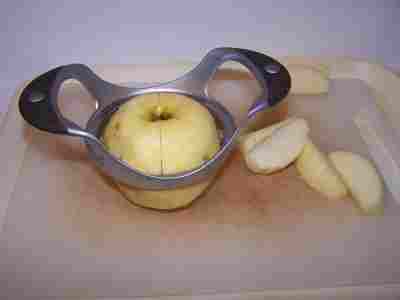 Chopping them is much faster if you use one of those
pear corer/segmenters - you just push it down on an pear and it cuts it
into segments.
Chopping them is much faster if you use one of those
pear corer/segmenters - you just push it down on an pear and it cuts it
into segments.  If you have a Foley food mill or seive or strainer, you do not need
to peel or remove seeds.
If you have a Foley food mill or seive or strainer, you do not need
to peel or remove seeds.
Again, if you do not have a sieve, be sure to remove any seeds, hard parts (usually the part around the seeds) and any mush or dark areas.
Step 5 - Cook the Pears
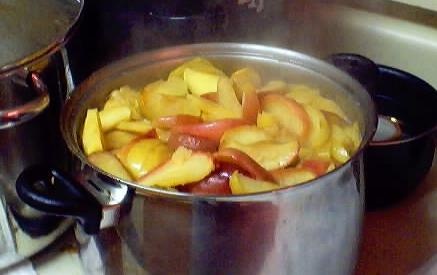 Pretty simple! Put about 1 inch of water (I used either filtered tap
water or store brand pear juice) on the bottom of a huge, thick-bottomed
pot. Put the lid on, and the heat on high. When it gets really
going, turn it to medium high until the pears are soft through and
through.
Pretty simple! Put about 1 inch of water (I used either filtered tap
water or store brand pear juice) on the bottom of a huge, thick-bottomed
pot. Put the lid on, and the heat on high. When it gets really
going, turn it to medium high until the pears are soft through and
through.
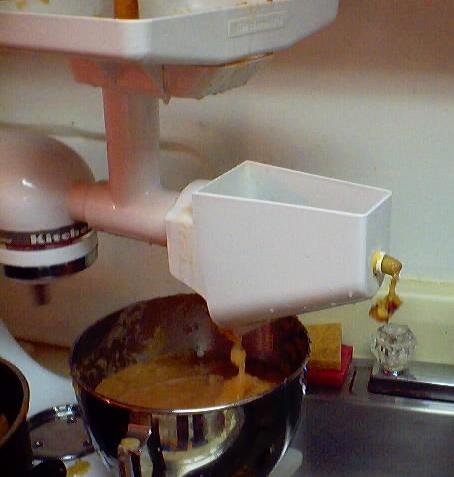
Step 6 - Sieve the cooked pears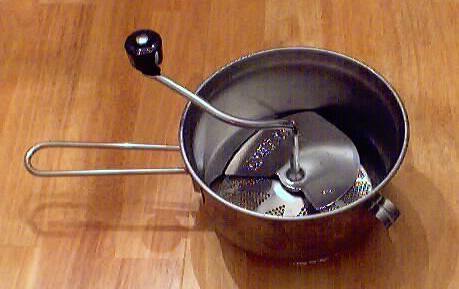
There are several ways to squish the pears through a sieve, either through a :
- hand-cranked Foley food mill (about $20 see this page ). Obviously, you have to crank it by hand, which is ok if you have child labor and aren't making a lot. If you are only making a dozen or two jars or don't have other uses for a KitchenAid, then this is a practical alternative - or
- A Villaware, Roma or Oxo strainer (about $60, see further down the page) or
- through a KitchenAid sieve/grinder (with the attachments, about $300, but it lasts a lifetime and is fast and easy to use - I can make 100 quart jars per day with one of these).
- To see a greater variety of strainers in other types, sizes, and prices, click here!
See here for related tools, equipment, supplies on Amazon
See here for related tools, equipment, supplies on Amazon
See here for related tools, equipment, supplies on Amazon
See here for related tools, equipment, supplies on Amazon
See here for related tools, equipment, supplies on Amazon
See here for related tools, equipment, supplies on Amazon
See here for related tools, equipment, supplies on Amazon

You CAN also use a simple metal sieve, but it will be VERY tedious, hard work - if you plan on making pearsauce every year, spring for the 25 bucks for the foodmill.
Basically, you put the cooked pears (including the skins, seeds, cores and stems) into the top hopper, and use the wooden plunger to push it in.
NOTE for those on a VERY tight budget or making just a small batch of pearsauce
 You CAN make
pearsauce without a
food processor or a $25 foodmill, but it's much
more work, and really only suitable for making a quart or two of pearsauce
at a time...
but it can be done - Click here
for the directions on making pear or applesauce with NO special equipment
You CAN make
pearsauce without a
food processor or a $25 foodmill, but it's much
more work, and really only suitable for making a quart or two of pearsauce
at a time...
but it can be done - Click here
for the directions on making pear or applesauce with NO special equipment
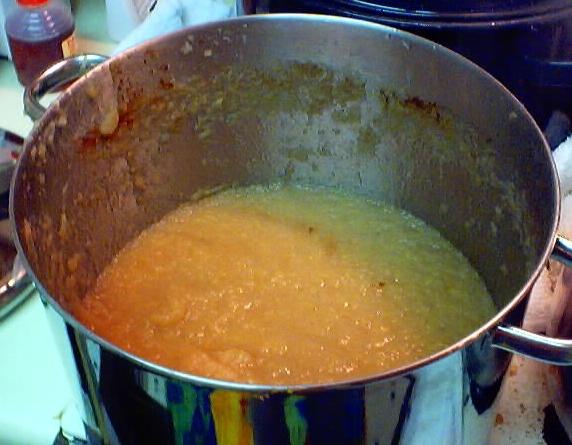
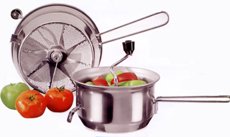
The device pushes it against a sieve and the
pearsauce comes out
underneath (in the chrome pot in the photo at left ), and the debris
shoots out the side into the sink - see photo below.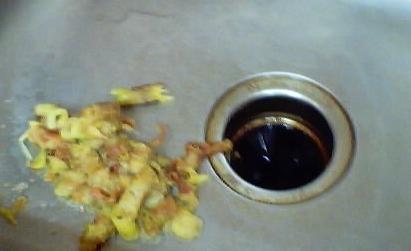
There is also a VERY nice, versatile strainer pictured at below, far right! Click on the links there or see the bottom of this page for more information and to order! The VillaWare model can handle higher volumes than a Foley food mill (without giving you cramps!)
See here for related tools, equipment, supplies on Amazon
See here for related tools, equipment, supplies on Amazon
To see a greater variety of strainers in other types, sizes, and prices, click here!
 Step 7 - Season and keep the
pear sauce hot
Step 7 - Season and keep the
pear sauce hot
Put the pearsauce into a large pot. Add cinnamon to taste. You should not need to add any sugar.
The pear sauce does not need any further cooking; just keep it hot until you get enough made to fill the jars you will put into the canner (Canners hold seven jars at once, whether they are quart or pint size)
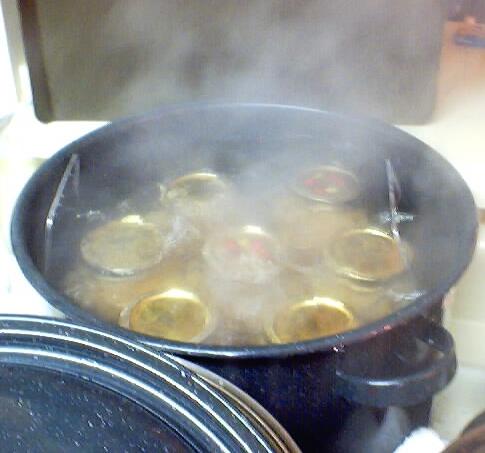 Step 8 - Fill the jars and process them in the water bath
Fill them to within 1/4-inch of the top, wipe any spilled pear sauce of the top, seat the lid and gently tighten the ring around them. Put them in the canner and keep them covered with at least 1 inch of water. Get the canner back to a full boil and begin timing. If you are at sea level (up to 1,000 ft) boil pint jars for 15 minutes and quart jars for 20 min. If you are at an altitude of 1,000 feet or more, see the chart below
.
|
Recommended process
time for pears auce in a |
||||
| Process Time at Altitudes of | ||||
| Quart Size | 0 - 1,000 ft | 1,001 - 3,000 ft | 3,001 - 6,000 ft | Above 6,000 ft |
| Pints | 15 min | 20 | 20 | 25 |
| Quarts | 20 | 25 | 30 | 35 |
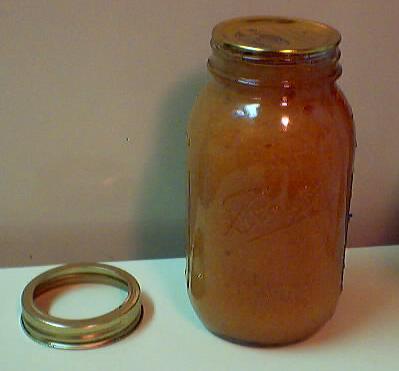 Step 9 - Remove and cool the jars - Done
Lift the jars out of the water and let them cool without touching or bumping them in a draft-free place (usually takes overnight) You can then remove the rings if you like, but if you leave them on, at least loosen them quite a bit, so they don't rust in place due to trapped moisture. Once the jars are cool, you can check that they are sealed verifying that the lid has been sucked down. Just press in the center, gently, with your finger. If it pops up and down (often making a popping sound), it is not sealed. If you put the jar in the refrigerator right away, you can still use it. Some people replace the lid and reprocess the jar, then that's a bit iffy. If you heat the contents back up, re-jar them (with a new lid) and the full time in the canner, it's usually ok.
Other Equipment:
From left to right:
- Jar lifting tongs
helpful to pick up hot jars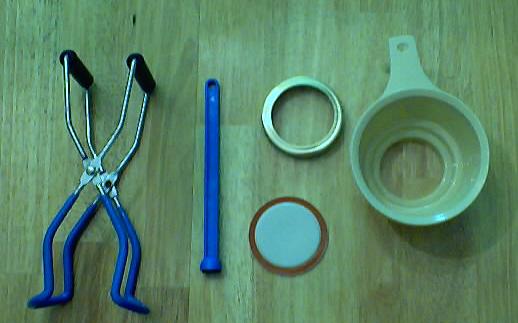
- Lid lifter
- to remove lids from the pot
of hot water - Lids
- disposable - you may only
use them once - Ring
- holds the lids on the jar until after
the jars cool - then you remove them, save them and reuse them - Canning Jar funnel
- to fill the jars
|
See here for related tools, equipment, supplies on Amazon See here for related tools, equipment, supplies on Amazon |
Complete Water Bath Canner KitThis is the same type of standard canner that my grandmother
used to make everything from pumpkinauce to jams and jellies to tomato
and spaghetti sauce. |
|
See here for related tools, equipment, supplies on Amazon |
Food Strainer and Sauce MakerA food strainer allows you to easily make smooth tomato sauces, seedless jams and jellies, applesauce, soups, baby foods, and much more. The strainers can use different sized screens to filter out different sized seeds and debris. There are both hand cranked and motorized versions.Click here for more information, other strainers and supplies or to order! |
See here for related tools, equipment, supplies on Amazon |
Mirro Stainless Steel Foley Food Mill
|
|
|
Lids, Rings, Jars, mixes, pectin, etc.Need lids, rings and replacement jars? Or pectin to make jam, spaghetti sauce or salsa mix or pickle mixes? Get them all here, and usually at lower prices than your local store! |
Can't find the equipment? We ship to all 50 states!
Tips
Comments and Feedback
Illustrated Canning, Freezing, Jam Instructions and Recipes
[ Easy Home Canning Directions] [FAQs - Answers to common questions and problems] [Recommended books about home canning, jam making, drying and preserving!] [Free canning publications to download and print]


Looking for canning equipment and supplies?
Water bath canner with a jar rack
Pressure canners for gas, electric and induction stoves: Presto 23Qt or T-fal 22Qt
Canning scoop (this one is PERFECT)
Ball Blue book (most recent version)
Find Other types of farms:
- Easter egg hunts
- Children's consignment sales
- Farm markets and roadside stands
- Road trips and camping resources
- Local Honey, apiaries, beekeepers
- Local Meat, Milk and Eggs
- Consumer fraud and scams information
- Home canning supplies at the best prices on the internet!
- Maple Syrup Farms, sugarworks, maple syrup festivals
- Environmental information and resources
- Farms For Your Event for birthday parties, weddings, receptions, business meetings, retreats, etc.
- Festivals - local fruit and vegetable festivals
- Pumpkin patches and corn mazes
- Christmas Tree Farms and lots
Get the
most recent version of
the Ball Blue Book
Get the
most recent version of
the Ball Blue Book of Home Canning
Find other types of farms:
- Easter egg hunts
- Children's consignment sales
- Farm markets and roadside stands
- Local Honey
- Local Meat, Milk and Eggs
- Road trip and camping
- Pumpkin patches and corn mazes
- Christmas Tree Farms and lots
- Maple Syrup farms and sugarworks
Highly rated canning supplies:
- Regular Mouth Canning Lids with food-grade with BPA Free Silicone seals for Ball, Kerr Jars for Canning
- Canning accessories kit: funnel, jar tongs, lid lifter, etc
- Food Dehydrator, 400W Electric with 8 Trays, 48 hour Timer and Temperature Control 95-176℉, BPA-Free
- Water Bath Canner, 21 Qts with lid, Jar Rack, Speckled Black, cans 7 quart jars, 9 pint jars or 13 half-pint jars
- Air Fryer: Instant Pot Instant Vortex Plus XL 8QT Clear Windows, Custom Programming, 8-in-1 Functions that Crisps, Broils, Roasts, Dehydrates, Bakes, Reheats
- Pressure canner: All American 921, 21.5qt Pressure Cooker/Canner, never needs gaskets, Great for Gas, Electric or Flat Top Stoves - Made in the USA
- The Backyard Homestead:a guide to homesteading , on 1/4 acre, how to raise grains and vegetables; raise animals for meat, eggs, and dairy; and keep honey bees
- Smart silent HEPA Air Purifiers for Home, Large Rooms for Allergies, Smoke, Pets. Eliminates 99.97% of Dust, Pet Hair, Odors
