
Peach Salsa Recipe- Home Canning Peach Salsa Easily! With Step-by-step Photos, Recipe, Directions, Ingredients and Costs
How to Make Homemade Peach Salsa
Click here for a PDF print version
 If
you like peach salsa like you've had in restaurants and bought in the
stores, then you will LOVE your own home made peach salsa. you can
impress friends and family with this easy and tasty recipe! You can
refrigerate it or can it to have in the winter! Here's how to do it,
complete instructions in easy steps and completely illustrated.
If
you like peach salsa like you've had in restaurants and bought in the
stores, then you will LOVE your own home made peach salsa. you can
impress friends and family with this easy and tasty recipe! You can
refrigerate it or can it to have in the winter! Here's how to do it,
complete instructions in easy steps and completely illustrated.
Prepared this way, the jars have a shelf life of about 12 to 18 months, and aside from storing in a cool, dark place, require no special attention.
For more information about stone fruits, see Peach Picking Tips
Peach Salsa Ingredients
Yield: About 7 pint jars
- 6 cups (21/4 pounds) chopped Roma tomatoes (about 3 pounds tomatoes as purchased)
- 21/2 cups diced yellow onions (about 1 pound or 2 large as purchased)
- 2 cups chopped green, red yellow and/or orange bell peppers (about 11/2 large peppers as purchased)
- 10 cups (31/2 pounds) chopped, firm peaches (about 9 medium peaches or 41/2 pounds as purchased peaches)
- 2 cups chopped Granny Smith apples or other tart apples (about 2 large apples as purchased) (optional, but they add flavor)
- 4 tablespoons mixed pickling spice
- 1 tablespoon canning salt
- 2 teaspoons crushed red pepper flakes
- 33/4 cups (11/4 pound) packed light brown sugar
- 21/4 cups cider vinegar (5%)
Equipment
- At least 1 large pot
- Large spoons and ladles,
- Jar grabber (to pick up the hot jars)
- Lid lifter (I like the lid rack that holds 12 lids or you can pull them out one at a time with the lid-lifter that has a magnet from the almost-boiling water where you sanitize them. ($4 at mall kitchen stores and local "big box" stores, but it's usually cheaper online from our affiliates)
- Jar funnel ($4 at mall kitchen stores and local "big box" stores, but it's usually cheaper online from our affiliates)
- Canning jars (often called Ball jars, Mason jars or Kerr jars) (Publix, Kroger, other grocery stores and some "big box" stores carry them - now about $12 per dozen quart jars (up 50% in 2 years!) including the lids and rings)
- 1 water bath canner (a huge pot with a lifting rack to sanitize the jars of peaches after filling (about $30 to $35 at mall kitchen stores and local "big box" stores, but it's usually cheaper online from our affiliates) You CAN use a large pot instead, but the canners are deeper, and have a rack top make lifting the jars out easier. If you plan on canning every year, they're worth the investment.
 Recipe and Directions
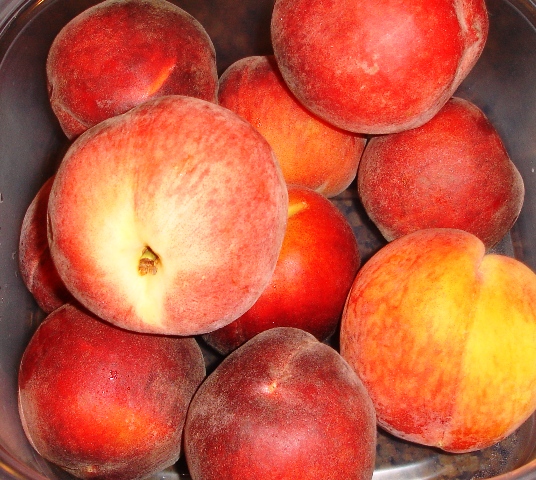
Step 1 - Selecting the peaches
Choose firm, not quite ripe, mature fruit of ideal quality. They should not be mushy, but they also should not be rock hard: just as very firm.
Step 2 - Wash the jars and lids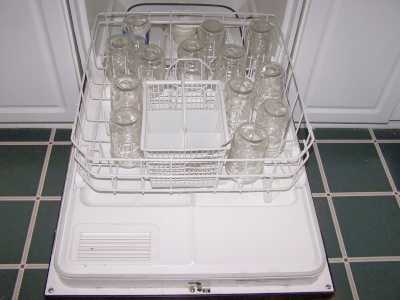
This is a good time to get the jars ready! The dishwasher is fine for the jars; especially if it has a "sanitize" cycle. Otherwise put the jars in boiling water for 10 minutes. I just put the lids in a small pot of almost boiling water for 5 minutes, and use the magnetic "lid lifter wand" (available from target, other big box stores, and often grocery stores; and available online - see this page) to pull them out.
Step 3 -Wash the peaches, apples and peppers
I'm sure you can figure out how to wash the fruit and vegetables in plain cold or lukewarm water.
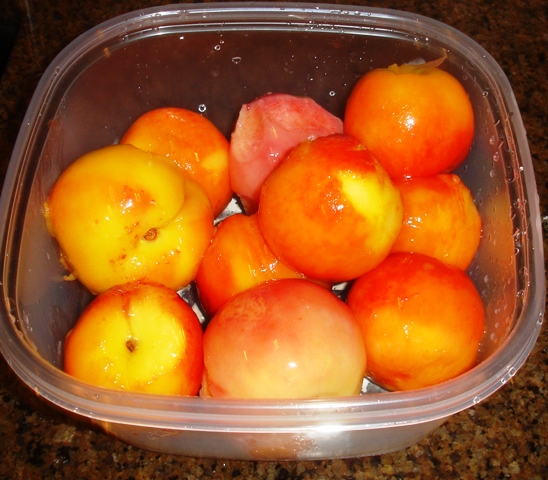
Step 4 - Peeling the Peaches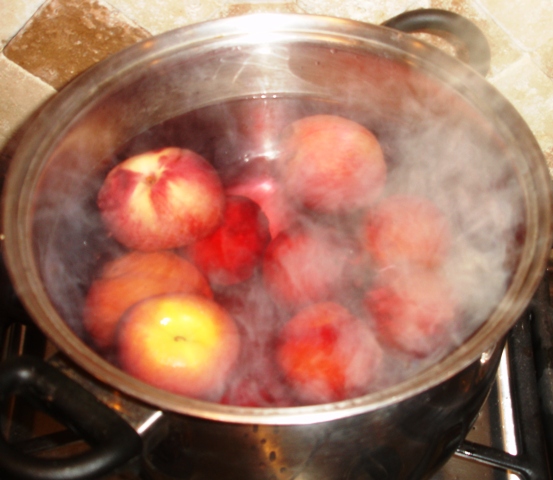
Peaches and nectarines should be peeled, as their skins can be tough / chewy in jam. Peaches have such thin skins, you really don't need to peel them.
For those you want to peel, here's a great trick that works with many fruits and vegetables with skins (like tomatoes): just dip the fruit in boiling water for 30 to 60 seconds.
Remove from the water using a slotted spoon and put into a large bowl or pot of cold water and ice.
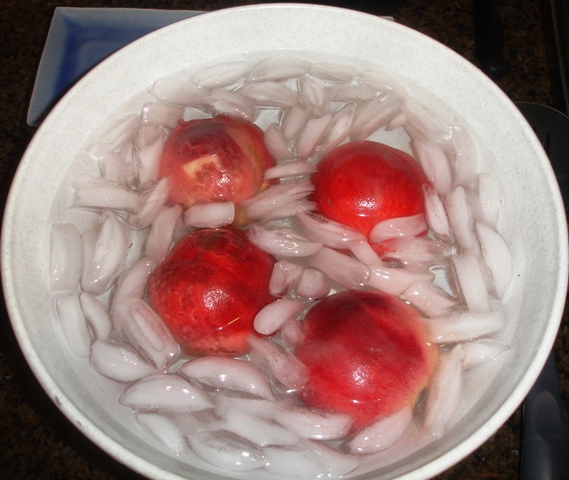
The skins will easily slide off now IF the peaches are ripe! The more unripe they are, the longer you will need to heat them.
Step 5 - Cut up the peaches
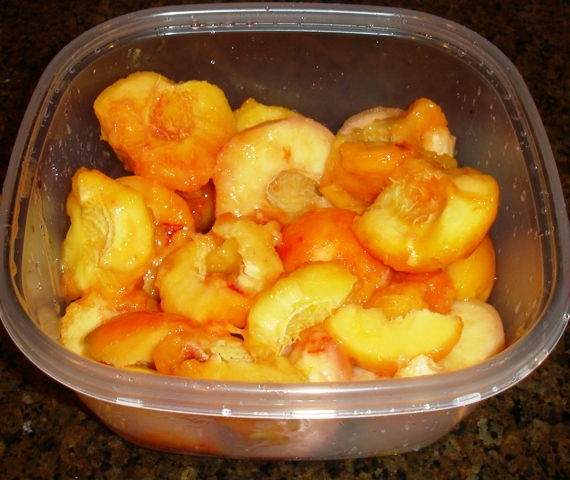
 Sprinkle with lemon juice, citric acid or FruitFresh
to prevent browning.
Sprinkle with lemon juice, citric acid or FruitFresh
to prevent browning.See here for related tools, equipment, supplies on Amazon
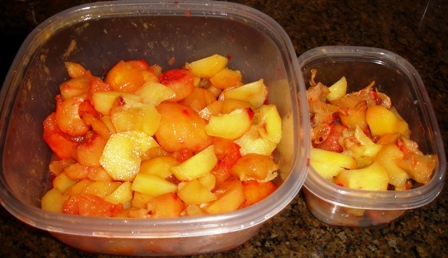
Step 6 - Peel, core and chop the apples, onions and peppers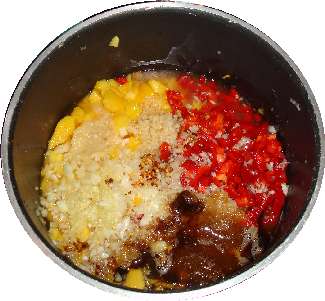
Wash, peel and core the apples, then cut them into halves and chop the apples into 1/2-inch cubes. - Prepare the onions and peppers
Peel, wash and dice onions into 1/4-inch pieces. Wash, core, and seed bell peppers; chop into 1/4-inch pieces.
Step 7 - Preparing the spice bag
Place 4 tablespoons mixed pickling spice on a clean, double-layered, 6-inch-square piece of 100% cheesecloth Bring corners together and tie with a clean string. (Or use a purchased muslin spice bag or use a baby's mesh ice holder. ). I use a baby's ice lollipop bag (available at mall kitchen stores, Target and other local "big box" stores) as it is reusable and easy to use (see the photo).
- 4 tablespoons mixed pickling spice
- 1 tablespoon canning salt
- 2 teaspoons crushed red pepper flakes
- 33/4 cups (11/4 pound) packed light brown sugar
Step 8 - Combine the veggies and fruit
Combine the chopped peaches, apples, tomatoes, onions and peppers in an 8- or
10- quart Dutch oven or saucepot.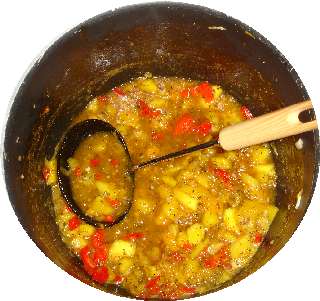
Step 9 - Add all ingredients and heat
Add the pickling spice bag to the saucepot; stir in the salt, red pepper flakes, brown sugar and vinegar. Bring to boiling, stirring gently to mix ingredients. Reduce heat and simmer 30 minutes, stirring occasionally.
Step 10 - Remove from the heat
Take the pot off the stove, remove spice bag from pan and discard the spices.
Step 11 - Fill the jars
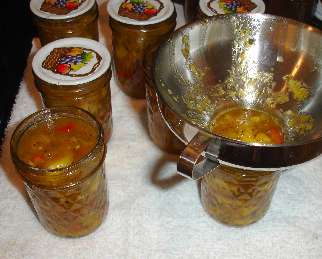 With
a slotted spoon, fill salsa solids into hot, clean pint jars, leaving
11/4-inch headspace (it takes about 3/4 pound solids in each jar). Cover
with cooking liquid, which then should leave 1/2-inch headspace.
With
a slotted spoon, fill salsa solids into hot, clean pint jars, leaving
11/4-inch headspace (it takes about 3/4 pound solids in each jar). Cover
with cooking liquid, which then should leave 1/2-inch headspace.
Wipe rim and screw threads with a clean damp cloth. Add lid, screw band and tighten firmly and evenly. Do not over tighten.
Remove air bubbles and adjust headspace if needed.
Step 12 - Process the jars in the water bath
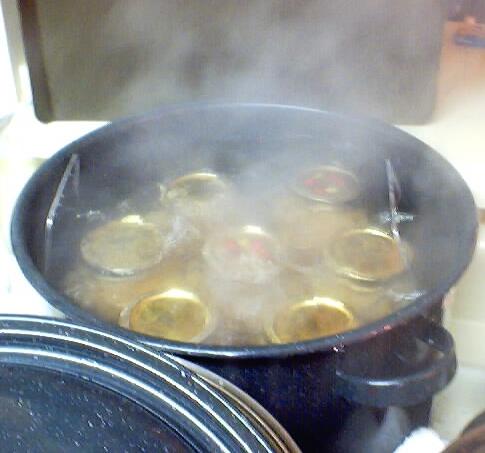 Put
the sealed jars in the canner and keep them cover with at least 1 inch
of water and boiling. Boil them for at least 15 minutes - as specified
in the table below, for your altitude..
Put
the sealed jars in the canner and keep them cover with at least 1 inch
of water and boiling. Boil them for at least 15 minutes - as specified
in the table below, for your altitude..
| USDA Recommended process time for Peache Salsa in a boiling-water canner. | |||
| Hot pack | Process Time at Altitudes of | ||
| Jar Size | 0 - 1,000 ft | 1,001 - 6,000 ft | Above 6,000 ft |
| Pints | 15 min | 20 | 25 |
Step 13 - Remove and cool
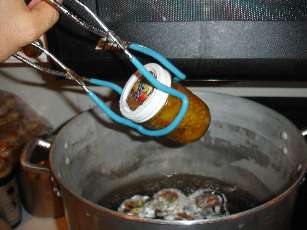 Lift
the jars out of the water and let them cool without touching or bumping
them in a draft-free place (usually takes overnight), here they won't be
bumped. You can then remove the rings if you like, but if you leave them
on, at least loosen them quite a bit, so they don't rust in place due to
trapped moisture. Once the jars are cool, you can check that they are
sealed verifying that the lid has been sucked down. Just press in the
center, gently, with your finger. If it pops up and down (often making a
popping sound), it is not sealed. If you put the jar in the refrigerator
right away, you can still use it. Some people replace the lid and
reprocess the jar, then that's a bit iffy. If you heat the contents back
up, re-jar them (with a new lid) and the full time in the canner, it's
usually ok.
Lift
the jars out of the water and let them cool without touching or bumping
them in a draft-free place (usually takes overnight), here they won't be
bumped. You can then remove the rings if you like, but if you leave them
on, at least loosen them quite a bit, so they don't rust in place due to
trapped moisture. Once the jars are cool, you can check that they are
sealed verifying that the lid has been sucked down. Just press in the
center, gently, with your finger. If it pops up and down (often making a
popping sound), it is not sealed. If you put the jar in the refrigerator
right away, you can still use it. Some people replace the lid and
reprocess the jar, then that's a bit iffy. If you heat the contents back
up, re-jar them (with a new lid) and the full time in the canner, it's
usually ok.
Peaches, pears and apples may also show a blue, red or pink color change
after canning. This is the result of natural chemical changes that sometimes
occur as fruits are heated. It is harmless and won't affect flavor!
Also, avoid storing canned food near heat sources such as a furnace,
water heater, hot water or sunny areas. Jars need to be kept cool and
dark
for longer storage life and to protect against spoilage. Be sure to store in
a dry place. If the lid or band rusts, that can cause the seal to break.
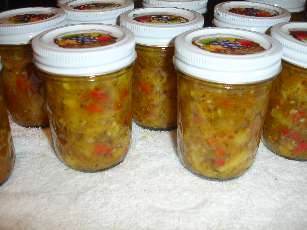
Your salsa will probably be darker in color than this. It depends upon how much spice you use and how long you cook it.
Adapted from the NCHFP recipe, developed at The University of Georgia, Athens, for the National Center for Home Food Preservation. Released by Elizabeth L. Andress, Ph.D., Department of Foods and Nutrition, College of Family and Consumer Sciences. August 2003.
Other Equipment:From left to right:
|
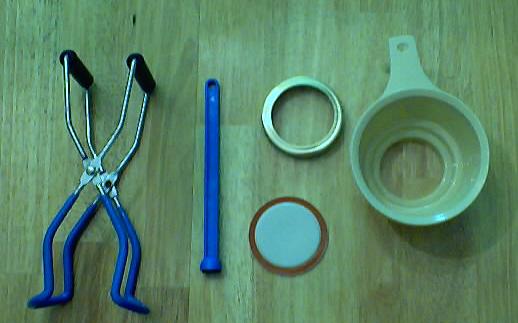 You can get all of the tools in a kit here: Canning kit with Stainless Steel Steam Rack,Canning Funnel, Jar Lifter, Jar Wrench, Lid Lifter, Canning Tongs, Bubble Remover Tool |


Looking for canning equipment and supplies?
Water bath canner with a jar rack
Pressure canners for gas, electric and induction stoves: Presto 23Qt or T-fal 22Qt
Canning scoop (this one is PERFECT)
Ball Blue book (most recent version)
Jars: 8oz canning jars for jams
Find Other types of farms:
Farm markets and roadside stands
Road trips and camping resources
Local Honey, apiaries, beekeepers
Consumer fraud and scams information
Home canning supplies at the best prices on the internet!
Maple Syrup Farms, sugarworks, maple syrup festivals
Environmental information and resources
Farms For Your Event for birthday parties, weddings, receptions, business meetings, retreats, etc.
Festivals - local fruit and vegetable festivals
Get the
most recent version of
the Ball Blue Book
