
Looking for How to dry your own herbs from fresh garden herbs (directions, recipe, with photos and free) in 2025? Scroll down this page and follow the links. And if you bring home some fruit or vegetables and want to can, freeze, make jam, salsa or pickles, see this page for simple, reliable, illustrated canning, freezing or preserving directions. There are plenty of other related resources, click on the resources dropdown above. If you are having a hard time finding canning lids, I've used these, and they're a great price & ship in 2 days.
If you have questions or feedback, please let me know! There are affiliate links on this page. Read our disclosure policy to learn more.
How to dry your own herbs from fresh garden herbs (directions, recipe, with photos and free)
How to dry your own herbs from fresh garden herbs
Imagine how your dishes will taste this winter if you have your own garden herbs to add to them. Its easy to dry or freeze some for a year-round supply of good quality herbs! Here's how to do it, complete instructions in easy steps and completely illustrated. You don't need any special equipment: air drying or room drying is the easiest, as well as, most inexpensive method for preserving herbs. Moisture evaporates slowly and naturally during air drying, leaving the precious herb oils behind. Dehydrators (see this page for more info, models and prices of food dryers) are useful if you want to dry large quantities of herbs or you have high moisture herbs such as basil.
Directions for Freezing herbs
Ingredients and Equipment
- fresh herbs - any quantity.
- glass or plastic containers, a vacuum food sealer, or "ziploc" type plastic bags.
Which method for which herb?
Click on the blue link below that corresponds to the herb you want to dry, as the method vary with different herbs!
- Sage, thyme, summer savory, dill, bay leaves, oregano, rosemary and marjoram are sturdy, low-moisture herbs that are best suited for air-drying.
- Basil, tarragon, lemon balm and the mints have a high moisture content and will mold if not dried quickly. So the oven, dehumidifier or dehydrator methods work better
- Chives are best frozen.

Start with fresh herbs - as fresh as you can get.
Tips
To release the full flavor, crush whole herb leaves or use a mortar and pestle to grind, just before adding to the recipe. When using dried herbs, add to soups and stews during the last half-hour of cooking or follow recipe directions. Be creative and add dried herbs to flavor your favorite foods.
Only use a microwave oven as a last resort for drying, as microwaves literally cook the herbs producing very poor quality.
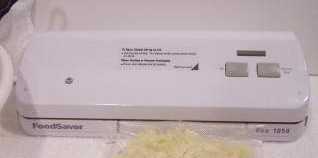
A vacuum-sealed FoodSaver bag is on top at left. You can see how the FoodSaver really sucks out all the air, so the herbs won't dry out or get freezer burn. That means the food inside will last many times longer. I've been using them (and their predecessor in the marketplace, Seal-a-Meal) for many years. If you're interested, here's where you can get one.
TIP: If you don't own a vacuum food sealer to freeze foods, place food in a Ziploc bags, zip the top shut but leave enough space to insert the tip of a soda straw. When straw is in place, remove air by sucking the air out. To remove straw, press straw closed where inserted and finish pressing the bag closed as you remove straw.
If you're interested, here's more information and where you can get a vacuum food sealer.


Looking for canning equipment and supplies?
Water bath canner with a jar rack
Pressure canners for gas, electric and induction stoves: Presto 23Qt or T-fal 22Qt
Canning scoop (this one is PERFECT)
Ball Blue book (most recent version)
Jars: 8oz canning jars for jams
Find Other types of farms:
Farm markets and roadside stands
Road trips and camping resources
Local Honey, apiaries, beekeepers
Consumer fraud and scams information
Home canning supplies at the best prices on the internet!
Maple Syrup Farms, sugarworks, maple syrup festivals
Environmental information and resources
Farms For Your Event for birthday parties, weddings, receptions, business meetings, retreats, etc.
Festivals - local fruit and vegetable festivals
Get the
most recent version of
the Ball Blue Book
