How to Can Oranges, Grapefruit, Tangerines and Other Citrus
at Home - Free, Easy, Illustrated Directions!
Click here
for a PDF Print version!
Have you got your own citrus trees or access in inexpensive
oranges, grapefruit, tangerines, tangelos, clementines, lemons, limes or other citrus? Making and canning your own
citrus easy. Here's how to do it, in easy steps and
completely illustrated. If your looking for an orange
marmalade recipe or other jam recipe and
directions, click here! We also have directions to make
applesauce, apple butter,
pickles and others!
Ingredients and Equipment
- Fruit - An average of 15 pounds of whole fruit is needed per
canner load of 7 quarts. To can in pint jars, an average of 13 pounds is
needed per canner load of 9 pints. This works out, overall, to an
average of about 2 pounds to yield 1 quart. You can scale this recipe up
or down as you need.
- Water - 6 cups water (I substitute orange juice instead of
water, for extra flavor)
- Sugar - about 4 cups of dry, granulated (table) sugar (not
needed if you use orange juice)
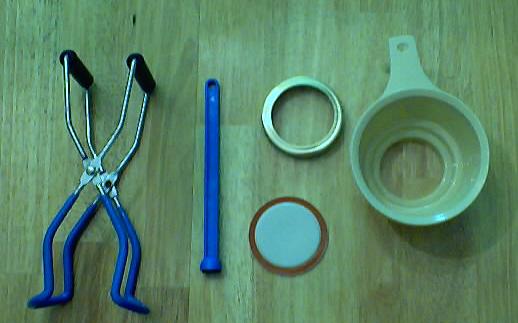
- Large spoons and ladles,
- Jar grabber (to pick up the hot jars) - Big box stores and grocery stores sometimes carry them; and it is available online - see this page. It's a tremendously useful to put jars in the canner and
take the hot jars out (without scalding yourself!). The kit sold
below has everything you need, and at a pretty good price:
See here for related tools, equipment, supplies on Amazon
|
- At least 1 medium or large pot; I prefer 16 to 20
quart Nonstick ceramic coated pots for easy cleanup: to make the sugar syrup (or
heat the orange juice or water)..
- 1 Water Bath Canner (a huge pot to sanitize the jars
after
filling (about $30 to $35 at mall kitchen stores, sometimes at big box stores and grocery stores.). Note:
we
sell canners and supplies here, too - at excellent prices - and it
helps support this web site!
- Half pint canning jars (Grocery stores, like Publix, Kroger, Safeway carry them, as do some big box stores - now about $12 per dozen quart jars (up 50% in 2 years!) including the lids and rings)
- Lids - thin, flat, round metal lids with
a gum binder that seals them against the top of the jar. They
may only be used once.
- Rings - metal bands that secure the lids
to the jars. They may be reused many times.
Optional stuff:
- Lid lifter (has a magnet to pick the lids out of the almost-boiling water where you sanitize them. ($4 at big box stores or it comes in the kit at left)
- Jar funnel ($5 at Target, other big box stores, and often grocery stores; and available online - see this page) or order it as part of the kit
with the Jar grabber ; not necessary, but helpful.
|
Canning Citrus Directions
This example shows you how to make homemade canned citrus. The yield from this recipe is about 18 eight-ounce jars (which is the same
as 9 pints).
Step 1 - Select the fruit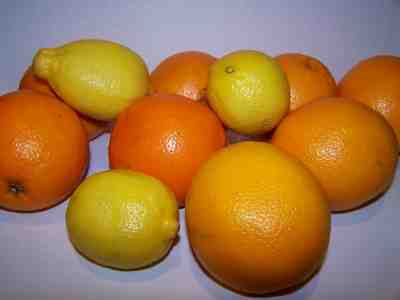
If you are lucky enough to live in Florida, southern California or the
deep south of Texas, you
can go pick your own Oranges in January and February! Otherwise,
you will have to go to the grocery store for the oranges and lemons.
Pick fresh citrus that are not soft, moldy or discolored.
The
flavor of sweet citrus (such as oranges and clementines) is best if the sections
are canned with equal parts of grapefruit. Grapefruit may be canned without
oranges. Sections may be packed in your choice of water, citrus
juice or syrup. We will see how to do any below!
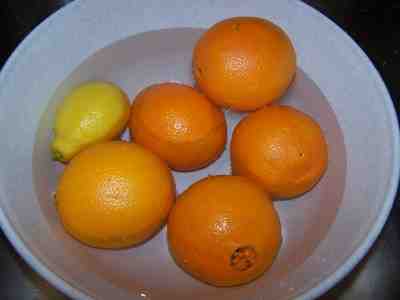 Step 2 - Wash the fruit
I'm sure you can figure out how to wash the fruit in plain
cold water, no soap.
Step 3 - Get the
jars and lids washed
The dishwasher is fine for the jars; especially if it has a "sanitize" cycle; you don't really have to sanitize
the jars - the boiling water bath sanitizes everything, jar,
lid, contents and all; but you DO want
to get the jars as clean as you can first, it it can reduce the process
time ithe water bath which improves quality.
I get the dishwasher going while I'm preparing everything else, so the
jars are clean and hot (and less likely to crack when you put boiling
hot fruit in them) by the time I'm ready to fill the jars.
Lids: Put the lids into a pan of
hot water for at least several minutes; to soften up the gummed surface
and clean the lids.

Need lids, rings and replacement jars?
Get them all here, delivered direct to your home, at the best prices on the internet!
Step 4 -Peel the fruit.
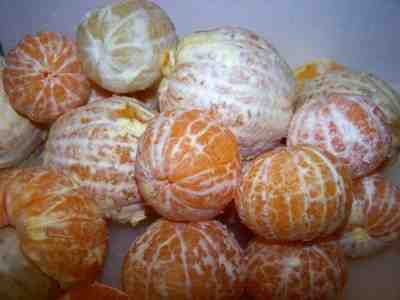
Using your fingers, peel the skins and remove any remaining white portion
of the rind, discard this - it is a tasteless and spongy.
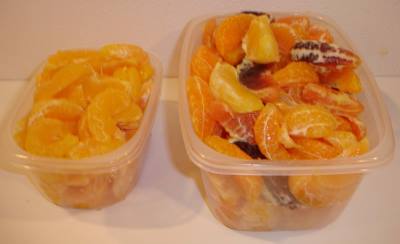
 Step
5 -Pull the segments apart or slice the oranges and lemons in segments
or in half; however you like!
Step
5 -Pull the segments apart or slice the oranges and lemons in segments
or in half; however you like!
Pull the segments apart by hand or
cut in half, across the segments, as shown; whichever you prefer. You may
want to also remove any seeds, as well. Beats spitting them out later
(yes, I know some people just swallow the seeds, but do you really want to risk
having a citrus tree growing out of your, um, ears? :)
More
seriously, your should
cut out and discard the tough, white part in the center - it's
tough, bitter and tasteless! Basically, anything that is white, is
bitter, and can be removed.
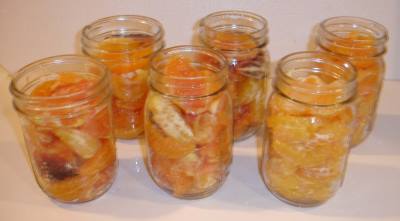
In the photo above, there are 4 types of oranges, from top left,
clockwise, pink oranges, navel oranges, honey oranges and blood oranges.

 The easiest way to
remove most of it is to just pull it off with your fingers. The
tough part in the center of the fruit by the seeds usually must be cut out with a pair of scissors.
The easiest way to
remove most of it is to just pull it off with your fingers. The
tough part in the center of the fruit by the seeds usually must be cut out with a pair of scissors.
Save any juice that leaks
out!
You
can use it in the syrup solutions you will make in the next step!
Step 7 - Prepare the syrup solution
Obviously, there needs to be some type of liquid around the fruit in the
jars. It is up to you whether you want to use a light or heave sugar
solution, plain water , or an artificial sweetener solution. If you want a
sugar solution, a very light, light, or medium syrup work best.
Adding syrup to canned fruit helps to retain its flavor, color and shape. It
is not a preservative; it does not prevent spoilage of
the fruit. That is accomplished by a combination of the water bath processing to
create a sterile environment, the jar sealing mechanism (lid and ring) to keep
it sealed, and the natural acidity of the fruit to prevent anything from
growing.
The following guidelines for preparing and using syrups offer a choice for a
"very light" syrup, which approximates the natural sugar content of many fruits.
The quantities of water and sugar to make enough syrup for a canner load of
pints or quarts are provided for each type of syrup.
| Sugar Solutions |
| Type of Syrup and typical uses |
Approximate
concentration
of sugar |
For a 9 Pint batch* |
For a 7 Quart Batch |
| Water |
Sugar |
Water |
Sugar |
| water - no added calories |
0% |
7 cups |
0 cups |
11 cups |
0 cups |
| very light - generally preferred for any sweet fruit, tastes the
most like fresh, natural fruit juice. |
10% |
6 and 1/2 cups |
3/4 cups |
10 and 1/2 cups |
1 and 1/4 cups |
| light - also good for most very sweet fruit. |
20% |
5 and 3/4 cups |
1 and 1/2 cups |
9 cups |
2 and 1/4 cups |
| medium - good for sweet apples, sweet cherries, most berries
and grapes |
30% |
5 and 1/4 cups |
2 and 1/4 |
8 and 1/4 cups |
3 and 3/4 cups |
| heavy - tart apples, apricots, sour cherries, gooseberries,
nectarines, peaches, pears and plums |
40% |
5 cups |
3 and 1/4 cups |
7 and 3/4 cups |
5 and 1/4 cups |
| very heavy - very sour fruit, like very sour cherries,
currants, etc. |
50% |
4 and 1/4 cups |
4 and 1/4 cups |
6 and 1/2 cups |
6 and 3/4 cups |
| artificial sweetener - diabetics prefer this or the plain
water solution! |
0% |
7 cups |
0 cups sugar- use Stevia (in a prepared form like Truvia, it measures same as sugar; if you use another form, you will need do your own conversion) - or Splenda, if you prefer,
or Nutrasweet to taste - about 30 packs |
11 cups |
0 cups sugar- use Stevia (in a prepared form like Truvia, it measures same as sugar; if you use another form, you will need do your own conversion) - or Splenda, if you prefer,
or Nutrasweet to taste - about 40 packs |
| fruit juice - of course, you can simply use a fruit juice.
Orange juice obviously works well for any citrus, but you can always use
the same juice as the fruit you are packing (if no oranges) |
10% (natural sugars) |
7 cups of fruit juice, no added water |
0 cups |
11 cups of fruit juice, no added water |
0 cups |
 Step
8 - Heat the syrup solution to a boil
Step
8 - Heat the syrup solution to a boil
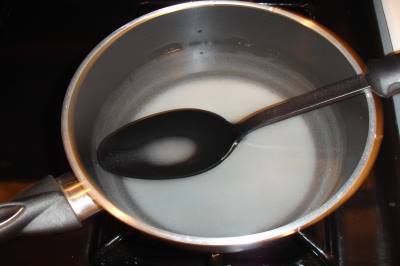
Heat the water and sugar together (or fruit juice, or plain water, as you
chose!). Bring it to a boil and pour over raw fruits in jars.
At left is a sugar solution being prepared. FYI, I prefer using orange
juice instead; but you still have to heat it to boiling.
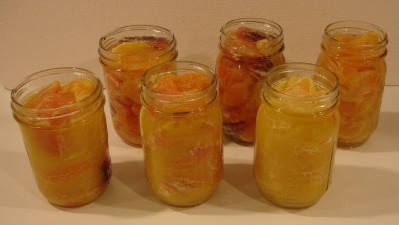
 Step 9 - Fill the jars with the prepared citrus fruit
While you are waiting for the syrup solution to come to a boil, fill the
cleaned jars with fruit. Fill the jars, snuggly BUT do not pack them
down, and be sure the top 1/2 inch of the jar is empty and clear.
Slide a butter knife inside each jar along the glass to help free any
trapped air bubbles and air pockets.
 Step 10 -
Pour the hot syrup into the jars and put the lid and
rings on
Step 10 -
Pour the hot syrup into the jars and put the lid and
rings on
Fill them with the hot syrup solution to within 1/2 to 1/4-inch of the top, wipe any spills off the
top, seat the lid and tighten the ring around them. Then put the filled jars into the canner!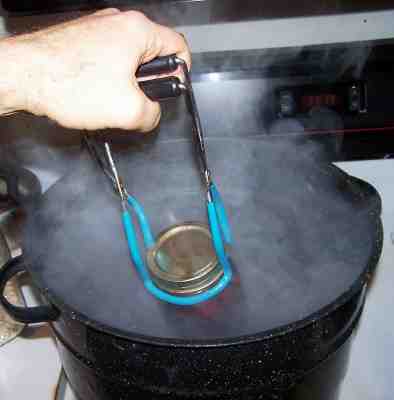
This is where the jar tongs come in really
handy!
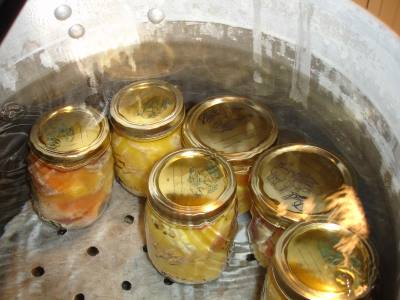 Step 11 - Process the jars in the boiling
water bath
Step 11 - Process the jars in the boiling
water bath
Keep the jars covered with at least 2 inches of water. Keep the water
boiling. Boil them for 10 minutes (if you are at sea level, up to 1,000 ft
in altitude, above that see the chart below).
Recommended processing time
for Citrus (Oranges, Grapefruit, Tangerines, Tangelos, Lemons, Limes,
Clementines, etc.) sections in pint or quart jars in a boiling-water canner
| Process Time at Altitudes of |
| 0 to 1,000 ft |
1,001 to 6,000 ft |
Above 6,000 ft |
| 10 minutes |
15 minutes |
20 minutes |
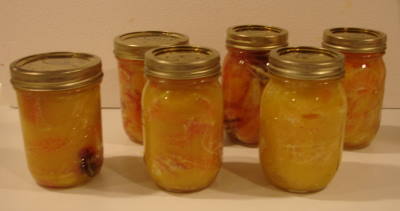 Step 12 - Done
Lift the jars out of the water and let them cool without touching or
bumping them in a draft-free place (usually takes overnight) You can then remove the rings if you like, but if you leave them on, at least loosen them quite a bit, so they don't rust in place due to trapped moisture. Once the jars are cool, you can check that they are sealed verifying that the lid has been sucked down. Just press in the center, gently, with your finger. If it pops up and down (often making a popping sound), it is not sealed. If you put the jar in the refrigerator right away, you can still use it. Some people replace the lid and reprocess the jar, then that's a bit iffy. If you heat the contents back up, re-jar them (with a new lid) and the full time in the canner, it's usually ok.
Once cooled, they're ready to store.
I find they last about
9 months. After that, the get darker in color and they lose some
firmness. They are safe to eat, but the flavor is bland. So
eat them in the first 6 to 9 months after you prepare them!
McSunley 21.5 quart Water Bath Canner, Stainless Steel
Granite Ware 21 QT, 9 Piece Enamelware Water bath Canning Pot with Canning kit, Colander and Rack
VKP Brands Water Bath AND Steam Canner, 20 Quart Stainless Steel, flat-bottomed Induction range compatible and safe for smooth top ranges.

|
Home Canning Kits
This is the same type of standard canner that my grandmother used to make everything from applesauce to jams and jellies to tomato and spaghetti sauce. This complete kit includes everything you need and lasts for years: the canner, jar rack, Jar grabber tongs, lid lifting wand, a plastic funnel, labels, bubble freer, and the bible of canning, the Ball Blue Book. It's much cheaper than buying the items separately. You will never need anything else except jars & lids (and the jars are reusable)! There is also a simple kit with just the canner and rack, and a Pressure Canner, if you want to do vegetables (other than tomatoes). To see more canners, of different styles, makes and prices, click here!
|
|
Canning & Preserving For Dummies in Paperback
|
Canning books
Canning & Preserving for Dummies
by Karen Ward
|
Price: |
|
$11.89 |
|
You Save: |
|
$5.10
(30%)
|
|
|
The Ball Blue Book of Home Canning
|
The All New Ball Book Of Canning And Preserving: Over 350 of the Best Canned, Jammed, Pickled, and Preserved Recipes Paperback
This is THE book on canning! My grandmother used this book when I
was a child. It tells you in simple instructions how to can almost
anything; complete with recipes for jam, jellies, pickles, sauces, canning
vegetables, meats, etc. If it can be canned, this book likely tells
you how! Click on the link below for more information and / or to buy (no
obligation to buy)
Click here for more information about the Ball Blue Book of Preserving
|
Summary - Cost of Making Homemade
Canned Citrus - makes 10 jars of 8 oz each*
|
| Item |
Quantity |
Cost in 2025 |
Source |
Subtotal |
| Oranges |
8
medium or large sized |
$2.00 |
Grocery store |
$2.00 |
| Canning jars (8 oz size), includes lids and
rings |
10 jars |
$11/dozen 8 oz jars
or $0.92/jar |
Grocery stores (Publix, Kroger, Safeway, etc.) |
$5.50 |
| Sugar |
4 cups |
$2.00 |
Grocery stores (Publix, Kroger, Safeway, etc.) |
$2.00 |
| Total |
|
|
|
$13.20 total
or about $1.32 per jar |
|
* - This assumes you already have the pots, pans, ladles,, and
reusable equipment. Note that you can reuse the jars! Many
products are sold in jars that will take the lids and rings for
canning. For example, Classico Spaghetti sauce is in quart sized
jars that work with Ball and Kerr lids and rings. Note that
the Classico's manufacturer does not recommend reuse of their jars:
see what they have to say on this
page:
|
Can't find the equipment? We
ship to all 50 states! Use our Feedback
form!
|
Don't forget about us
in the Spring for pick your own strawberries, vegetables oand other
fruit! See our companion websites,
www.pickyourownchristmastree.org for choose and cut Christmas tree
farms and
PumpkinPatchesAndMore.org to find a corn
maze, hay ride and more in October!
Remember to ALWAYS call the
farm or orchard BEFORE you go - weather, heavy picking and business
conditions can always affect their hours and crops!
All images and text ©
Copyright © Benivia, LLC 2004,2005, 2006, 2007
Disclaimer
Permission is given to link to any page on
www.pickyourown.org
Questions, corrections, suggestions or want to
recommend a farm to add? Click on:
How to Add a Farm to PickYourOwn.org or Write me at
 |