Looking for How to Make Pickled Peppers - Easily! With Step-by-step Photos, Recipe, Directions, Ingredients in 2025? Scroll down this page and follow the links. And if you bring home some fruit or vegetables and want to can, freeze, make jam, salsa or pickles, see this page for simple, reliable, illustrated canning, freezing or preserving directions. There are plenty of other related resources, click on the resources dropdown above. If you are having a hard time finding canning lids, I've used these, and they're a great price & ship in 2 days.
If you have questions or feedback, please let me know! There are affiliate links on this page. Read our disclosure policy to learn more.
How to Make Pickled Peppers - Easily! With Step-by-step Photos, Recipe, Directions, Ingredients
 How to Make Homemade Pickled Peppers,
Hot or sweet, including Chilies, Pimiento, Hungarian, Banana, Jalapeno,
Etc.
Click here for a PDF print version
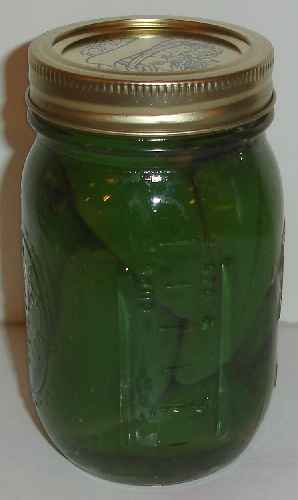
You think only Peter Piper can pick a peck of peppers and pickle them? Nah! Here's how to make and can your own pickled peppers! The directions are complete with instructions in easy steps and completely illustrated. In the winter when you open a jar, the peppers will taste MUCH better than any store-bought canned peppers.
Prepared this way, the jars have a shelf life of about 12 months, and aside from storing in a cool, dark place, require no special attention. If you'd rather can peppers UN-pickled, and you have a Pressure Canner, see this page on how to can peppers.
Directions for Making Pickled Peppers
Yield: Typical yield is 9 pints
Ingredients
- Peppers (see step 1) 8 lbs total:
A typical mix is 4 lbs of hot peppers AND 3 lbs of sweet red and green peppers, but you can mix and match any type of peppers - 5 cups vinegar (5%). Distilled white vinegar helps preserve the original color of the peppers. Cider, wine and malt vinegars may be safely used, but they tend to darken then color of the peppers.
- 1 cup water
- 4 tsp canning or pickling salt
- 2 tbsp sugar
- 2 cloves garlic
Equipment
- Jar grabber (to pick up the hot jars)
- Jar funnel ($4 at mall kitchen stores and local "big box" stores, but it's usually cheaper online from our affiliates)
- Large spoons and ladles,
- At least 1 large pot
- One 6 - 8 quart pot or saucepan
- Canning jars (often called Ball jars, Mason jars or Kerr jars) (Publix, Kroger, other grocery stores and some "big box" stores carry them - now about $12 per dozen quart jars (up 50% in 2 years!) including the lids and rings)
- 1 Water Bath Canner (a huge pot to sanitize the jars after filling (about $30 to $35 at mall kitchen stores, sometimes at big box stores and grocery stores.). Note: we sell many sizes and types of canners for all types of stoves and needs - see canning supplies
Recipe and Directions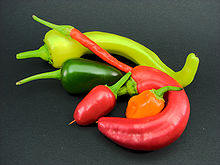
Step 1 - Selecting the peppers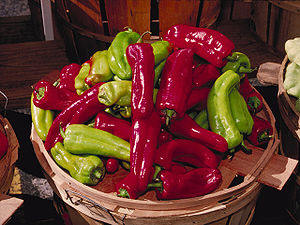
The most important step! You need peppers that are FRESH and crisp. Limp, old peppers will make nasty tasting canned peppers. Guests will probably throw them at you.. Select filled but tender, firm, crisp peppers. Remove and discard any soft, diseased, spotted and rusty pods. Select firm, young peppers. Older, larger peppers are often too fibrous and tough.
Hot pepper caution: Wear plastic or
rubber gloves and do not touch your face while handling or cutting hot
peppers. If you do not wear gloves, wash hands thoroughly with soap and
water before touching your face or eyes. Hot peppers can burn your eyes and
skin - ever heard of pepper spray?
How many peppers and where to get them
You can grow your own, pick your own, or buy them at the grocery store. An average of 7 to 9 pounds is needed per canner load of 9 pints jars. A bushel of peppers weighs 25 pounds and yields 20 to 30 pints canned; an average of 1 pound per pint.
The recipe, as stated in the ingredients section, will yield about 9 pints
Step 2 - Prepare the jars and pressure canner
Wash the jars and lids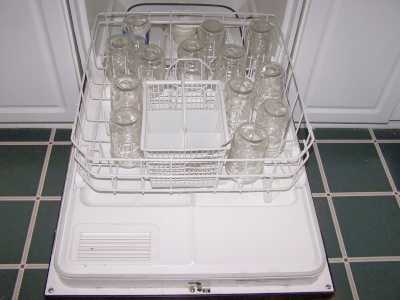
This is a good time to get the jars ready! The dishwasher is fine for the jars; especially if it has a "sanitize" cycle. Otherwise put the jars in boiling water for 10 minutes. I just put the lids in a small pot of almost boiling water for 5 minutes, and use the magnetic "lid lifter wand" (available from target, other big box stores, and often grocery stores; and available online - see this page) to pull them out.
Get a large pot of water boiling
We will use this water to pour over the peppers and fill each jar with liquid, after we've packed them full of peppers. I use the largest pot I have, so that there is plenty of clean, boiling water ready when I need it.
Get the pressure canner heating up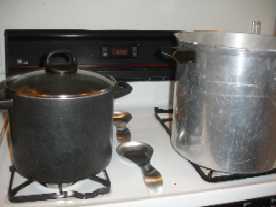
Rinse out your pressure canner, put the rack plate in the bottom, and fill it to a depth of 4 inches with hot tap water. (of course, follow the instruction that came with the canner, if they are different). Put it on the stove over low heat, with the lid OFF of it, just to get it heating up for later on.
Step 3 -Wash the peppers!
I'm sure you can figure out how to rinse the peppers in
plain cold or lukewarm water.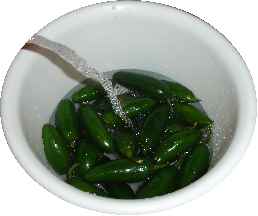
Step 4 - Cut up the peppers, remove seeds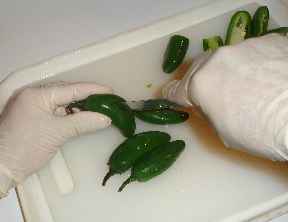
Small peppers may be left whole. If small peppers are left whole, slash 2 to 4 slits in each. Large peppers should be quartered. Remove cores and seeds.
Step 5 - Blister the peppers
Peppers have a skin that turns REALLY tough when you can the peppers, so you've got to remove the skin before canning. Fortunately, there is an easy trick to remove the skins. It's called "blistering". Just heat up a fry pan to medium hot, and lay the peppers in there skin side down. In just a few minutes, the skin will start bubble up and darken - that's blistering - once cooled, the skin peels off easily by hand.
Here are some other methods for how to blister peppers:
Oven or broiler method: Place peppers in a hot oven or broiler set at 400º to 450ºF (205º to 232ºC) for 6 to 8 minutes; using tongs carefully turn pepper often until skin blisters evenly on all sides.
Stove top method: Place peppers on wire mesh over a hot electric or gas burner; using tongs carefully turn peppers frequently, exposing all surfaces to the heat source until skin blisters evenly on all sides.
Outdoor grill method: Place peppers on a charcoal or gas grill about 5 to 6 inches above glowing coals; using tongs carefully turn peppers frequently (skin side down if they are cut up), exposing all surfaces to the heat source until skin blisters evenly on all sides.
Microwave oven method: Place peppers in a microwave
safe dish; cover with secure air-tight lid to allow
for steam build up. Place container on rotating plate in
the center of the oven, then microwave for 7 to 8 minutes
depending the oven wattage and power level (settings
may vary depending on microwave oven used). The blistering is not
visible with this method. However, the skin will have a tougher, more
brittle texture compared to the raw pepper. Allow steam to fully develop
in the covered container for 1to 2 minutes after microwave cooking.
Caution: The hot steam will be released from container when the lid is
opened - don't get burned!
Peeling the Peppers
Allow the peppers to cool by placing them in a pan and cover with a damp cloth. This will make peeling the peppers easier. Then pull the blistered skin off the rest of the pepper with a gentle tug and an occasional rinse with water. In areas of the pepper where the blistering was not complete, just scrape the skin off with a knife or vegetable peeler.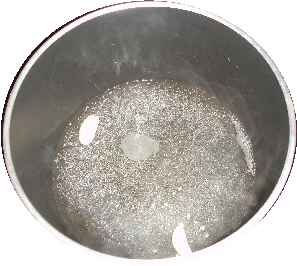
Step 6 - Combine and heat other ingredients
In the saucepan, combine:
- 5 cups vinegar (5%)
- 1 cup water
- 4 tsp canning or pickling salt
- 2 tbsp sugar
- 2 cloves garlic
Heat it to boiling and simmer for 10 minutes. Then remove the garlic (and discard).
Step 7 - Pack the jars and pour the vinegar solution into each packed jar
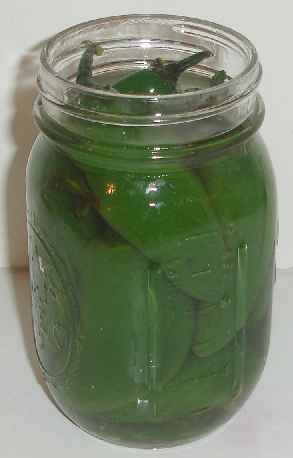 Fill
jars, leaving 1/2-inch of headspace. Flatten whole peppers. You may add
1/2 teaspoon of salt to each pint jar, if desired for taste (it is not a
preservative). Fill jars loosely with peppers. Be sure to leave 1 inch
of space at the TOP of the jar. That is called "headspace" and is
needed for expansion during heading. Use a ladle or pyrex
measuring cup to carefully fill each packed jar with the vinegar
solution from step 6. The peppers should be covered and there should
still be 1/2 inch of airspace left in the top of each jar. Be careful
not to burn yourself, (or anyone else - children should be kept back
during this step!)
Fill
jars, leaving 1/2-inch of headspace. Flatten whole peppers. You may add
1/2 teaspoon of salt to each pint jar, if desired for taste (it is not a
preservative). Fill jars loosely with peppers. Be sure to leave 1 inch
of space at the TOP of the jar. That is called "headspace" and is
needed for expansion during heading. Use a ladle or pyrex
measuring cup to carefully fill each packed jar with the vinegar
solution from step 6. The peppers should be covered and there should
still be 1/2 inch of airspace left in the top of each jar. Be careful
not to burn yourself, (or anyone else - children should be kept back
during this step!)
Step 8 - Put the lids and rings on
Put the lids on each jar and seal them by putting a ring on and screwing it down snugly (but not with all your might, just "snug").
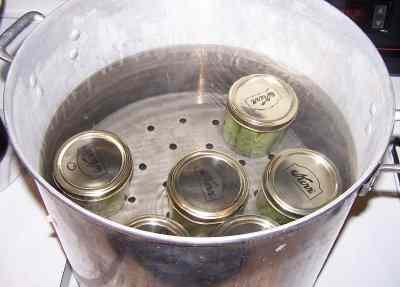
Step 9 - Boil the jars in the canner
Put the jars in the canner and keep them covered with at least 1 inch of water. Keep the water boiling. Boil them for 10 minutes. Remember to adjust for altitudes and larger jars - see the table below!
|
Recommended process time for Pickled Hot Peppers in a boiling-water canner. |
|||
| Process Time at Altitudes of | |||
| Jar Size | 0 - 1,000 ft | 1,001 - 6,000 ft | Above 6,000 ft |
| Half-pints or Pints | 10 min | 15 | 20 |
Step 10 - Remove the jars
Lift the jars out of the water and let them cool on a wooden cutting
board or a towel, without touching or bumping them in a draft-free
place (usually takes overnight), here they won't be bumped. You can then
remove the rings if you like, but if you leave them on, at least loosen
them quite a bit, so they don't rust in place due to trapped moisture.
Once the jars are cool, you can check that they are sealed verifying that
the lid has been sucked down. Just press in the center, gently, with your
finger. If it pops up and down (often making a popping sound), it is not
sealed. If you put the jar in the refrigerator right away, you can still
use it. Some people replace the lid and reprocess the jar, then that's a
bit iffy. If you heat the contents back up, re-jar them (with a new lid)
and the full time in the canner, it's usually ok. You're done!
Other Equipment:
From left to right: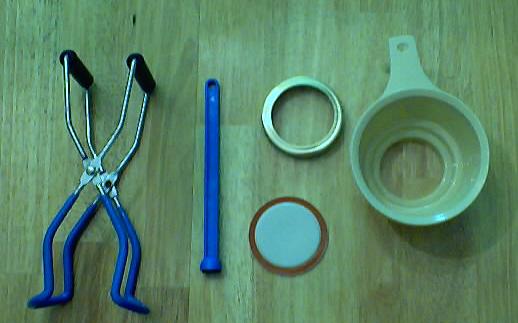
- Jar lifting tongs
helpful to pick up hot jars - Lid lifter
- to remove lids from the pot
of hot water - Lids
- disposable - you may only
use them once - Ring
- holds the lids on the jar until after
the jars cool - then you remove them, save them and reuse them - Canning Jar funnel
- to fill the jars
Frequently Asked Questions
A. Yes. The instructions are above.
Q. Is it safe to can peppers (without pickling them) in a traditional water bath canner? If so how long do you do process them?
A. The answer, quite simply is no - You cannot "can peppers" in an ordinary water bath canner, without adding vinegar and thus pickling them (DON'T confuse this statement with "you may can PICKLED peppers in a water bath canner" (pickling them changes everything). If you'd rather can peppers UN-pickled, and you have a Pressure Canner, see this page on how to can peppers. Quoting from the Ohio State University Extension's Fact Sheet:
"Pressure canning is the only safe method for home canning vegetables (which are not being pickled OR have sufficient natural acid, like tomatoes - ed). Clostridium botulinum is the bacterium that causes botulism food poisoning in low-acid foods, such as vegetables. The bacterial spores are destroyed only when the vegetables are processed in a Pressure Canner at 240 degrees Fahrenheit (F) for the correct amount of time.Clostridium botulinum is the bacterium commonly found in vegetables and meats. It is harmless until it finds itself in a moist, low-acid, oxygen-free environment or a partial vacuum. Under these conditions, the bacterium can grow and produce toxins dangerous to people and animals.
Do not process (low acid) vegetables using the boiling water bath because the botulinum bacteria can survive that method.
Can fruits and vegetables be canned without heating if aspirin is used? No. Aspirin should not be used in canning. It cannot be relied on to prevent spoilage or to give satisfactory products. Adequate heat treatment is the only safe procedure.Is it safe to can peppers in a boiling water bath if vinegar is used? No. Recommended processing methods must be used to assure safety. Recommended processing times cannot be shortened if vinegar is used in canning fresh vegetables. (This does not refer to pickled vegetables.)
Salt and sugar are not preservatives for vegetables: they are added to stabilize and improve flavor, but will not prevent spoilage.
Salicylic acid is also NOT a preservative. The University of Illinois reports:
Using Aspirin for Canning
Several years ago, a recipe circulated using aspirin to acidify tomatoes and peppers for canning. Aspirin is not recommended for canning. While it contains salicylic acid, it does not sufficiently acidify tomatoes or peppers for safe hot water bath canning. Green peppers are low acid foods and may only be processed safely in a pressure canner. Lemon juice or vinegar is recommended to acidify tomato products for safe water bath processing.
Think of it like smoking. We all know someone who smoke their entire life and lived to be 90. But the cemeteries are filled with the vast majority who didn't. You will hear people say "my grandmother did it that way for 20 years". But of course, the people who died from food poisoning aren't around and often didn't have descendants to tell their tale...
Pressure canners!If you want to can low-acid foods such as red meats, sea food, poultry, milk, and all fresh vegetables with the exception of most tomatoes, you will need a Pressure Canners. These foods fit into the low acid group since they have an acidity, or pH level, of 4.6 or greater. The temperature which must be reached and maintained (for a specified amount of time) to kill the bacteria is 240 F. Pressure canning is the only canning method recommended safe by the U.S.D.A. for low-acid foods such as vegetables, meats, and fish. Ordinary water bath canners can only reach 212 F and cannot to kill the types of bacteria that will grow in low acid foods. This temperature can be reached only by creating steam under pressure as achieved in quality pressure canners. There are several manufacturers of pressure canners. The two leading ones are Presto and All American (Wisconsin Aluminum). They are more expensive than water bath canners, but extremely well built - I bought mine in 1988 and it still looks and works like new!
|
|||

|
Presto 01781 23-Quart Pressure Cooker/CannerThis is usually one of the best-priced pressure canners. They are reliable and inexpensive. I've had mine for 40 years. There is also a 16 quart version for even less. Click on the links at left or above for more info and current pricing. |
||
|
|
Shown at left is the Presto 23 quart pressure canner. Features below and
click here for more information or to purchase from Target.
See the seller's website for features, pricing and user reviews! |
||
| All-American 915 pressure canner All-American 930 Pressure Canner |
All American Pressure Canner and Cookers - In 3 sizesSee the seller's website for features, pricing and user reviews! |
||
|
|
Lids, Rings, Jars, mixes, pectin, etc.Need lids, rings and replacement jars? Or pectin to make jam, spaghetti sauce or salsa mix or pickle mixes? Get them all here, and usually at lower prices than your local store! |


Looking for canning equipment and supplies?
Water bath canner with a jar rack
Pressure canners for gas, electric and induction stoves: Presto 23Qt or T-fal 22Qt
Canning scoop (this one is PERFECT)
Ball Blue book (most recent version)
Jars: 8oz canning jars for jams
Find Other types of farms:
Farm markets and roadside stands
Road trips and camping resources
Local Honey, apiaries, beekeepers
Consumer fraud and scams information
Home canning supplies at the best prices on the internet!
Maple Syrup Farms, sugarworks, maple syrup festivals
Environmental information and resources
Farms For Your Event for birthday parties, weddings, receptions, business meetings, retreats, etc.
Festivals - local fruit and vegetable festivals
Get the
most recent version of
the Ball Blue Book
