
Looking for How to Freeze Apples at Home in 2025? Scroll down this page and follow the links. And if you bring home some fruit or vegetables and want to can, freeze, make jam, salsa or pickles, see this page for simple, reliable, illustrated canning, freezing or preserving directions. There are plenty of other related resources, click on the resources dropdown above. If you are having a hard time finding canning lids, I've used these, and they're a great price & ship in 2 days.
If you have questions or feedback, please let me know! There are affiliate links on this page. Read our disclosure policy to learn more.
How to Freeze Apples at Home
Freezing Apples for Home Storage
Apples store well in a cool, dry area, like a basement or root cellar, but over time, they do tend to dry out and get a wrinkly skin and Styrofoamy texture. Freezing retains the taste much better, and leaves them fine for cooked recipes. Here's how to freeze the apples, in easy steps:
Directions
 Step 1 -
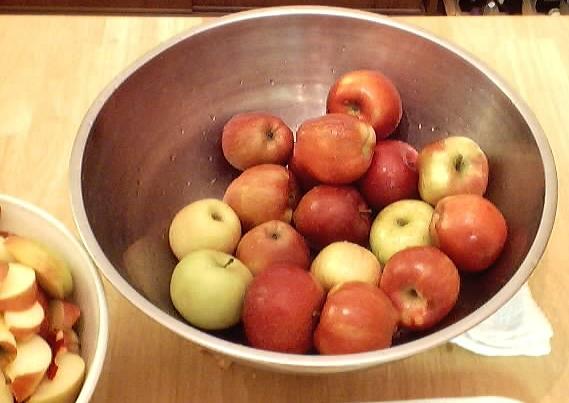
Selecting the apples
Step 1 -
Selecting the apples
The most important step! You need apples that are sweet - NOT something like Granny Smith's. Yeah, I know you like them (why do sweet women like sour apples???) and even if I did, they still wouldn't make good applesauce - you'd have to add a lot of sugar.
Step 2 - How many apples and where to get them
You can pick your own, or buy them at the grocery store. But for large quantities, you will find that real* farmer's markets, like the Farmer's Market in Forest Park, Georgia have them at the best prices. In 2004, they were available from late September at $11 to $16 per bushel. 2005 prices have been in the $14 to $20 range at the real farmer's markets, like the Atlanta-Forest park Georgia State Farmer's Market and orchards in the southeast of the U.S.
If you plan to later make applesauce, you will get about 12 to 16 quarts of applesauce per bushel of apples. Count on 13 or 14 quarts per bushel.
* - not the cutesy, fake farmer's markets that are just warehouse grocery stores that call themselves farmer's markets.
 Step
3 -Wash the apples!
Step
3 -Wash the apples!
I'm sure you can figure out how to wash the apples in plain cold water.
Step 4 - Choose your method and syrup
You can freeze the apples in a syrup, sugar, or dry, depending upon how you intend to use them later. A Syrup Pack is preferred for apples to be used for uncooked desserts or fruit cocktail. A sugar or dry pack is good for pie making. The dry pack can be used any way. The sugar and syrup pack methods are less likely to brown or have freezer burn.
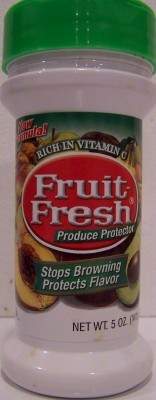
- Syrup Pack - Use cold 40 percent syrup. (That is 2 cups of sugar added to every 3 cups of water. ) Of course, you can scale this up or down to suit the amount of apples you have. To prevent browning, add 1/2 teaspoon (1500 mg) ascorbic acid (also known as "FruitFresh") to each quart of syrup.
- Sugar Pack - To prevent darkening, dissolve 1/2 teaspoon (1500 mg) ascorbic acid (also known as "FruitFresh") in 3 tablespoons water. You will need 1/2 cup sugar per quart (1 1/4 pounds) of peeled, sliced apples.
- Dry Pack - To prevent darkening, dissolve 1/2 teaspoon (1500 mg) ascorbic acid (also known as "FruitFresh") in 3 tablespoons water.
Step 5 - Peel the apples
The fastest way to peel the apples is one of these peelers! With firm apples, it takes about 20 seconds per apple. These apple peelers don't work well on soft, mushy apples or apples with soft spots on them. In that case your stuck with a hand peeler!
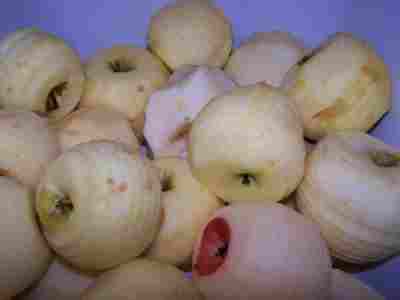 Once they're peeled, remove any remaining brown spots.
These apple peelers work absolutely great on firm apples, pears and potatoes. They don't work so well on apples that are mush or have soft spots. There are 2 types of peelers: those that have a suction base ("Back to Basics", below) and those that clamp on to the edge of a table ("Progressive" below"). I prefer the suction type as you can use it more places. Click on the links below for more info or to order one.
See here for related tools, equipment, supplies on Amazon See here for related tools, equipment, supplies on Amazon
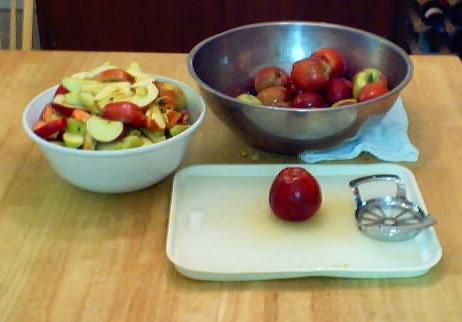
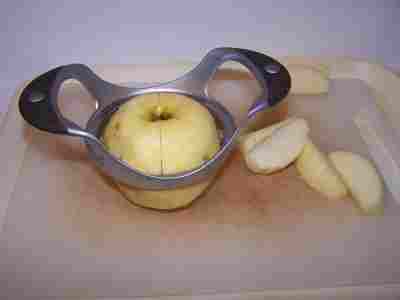 Step 6 - Core and Slice
You can use a knife, but the $5 corer/slicer you see in the photo is the easiest way to do it. The apple corer/slicer, available at almost any large grocery store, kitchen store, Bed Bath and Beyond, mall kitchen stores, Target and other local "big box" stores
With this or an ordinary knife, any slices that are between 1/4-inch and 1/2 inch thick will do.
Remove seeds, stems, any hard parts near the seeds and brown or soft spots.

Here are the apple slices, ready for the pie filling!
These corer/slicers are fantastic. Think about it; it makes six slices in the time you can cut one with a knife AND it cores. The one sold here is better than any I've seen in the stores because it has tall handles (so you won't knock your knuckles) and is washable in the dishwasher. Click on the link below for more info or to order one.
See here for related tools, equipment, supplies on Amazon See here for related tools, equipment, supplies on Amazon
Step 7 - Mix the apples with the solution, sugar mix or FruitFresh.
Use a bowl to mix apple slices with the syrup solution. If you are using a sugar pack or dry pack; use either a bowl or a large plastic bag (gallon size ZipLocs work well) to evenly coat the apple slices.
See here for related tools, equipment, supplies on AmazonStep 8 - Pack the slices into your freezer containers
Pack the slices into your freezer containers (freezer bags or plastic freezer containers... or glass (but due to risk of breakage, I tend not to use glass in the freezer). If you are using the dry pack approach, the treated apple slices can also be frozen first on a tray and then packed into containers as soon as they are frozen.
Step 9 - Freeze!
That's it! They're done. If your freezer is good and cold (below 25 F) they should keep for many months. Try to avoid frost-free freezers, as they cycle briefly above freezing!
Freezing keeps apples safe to eat almost indefinitely, but the recommended maximum storage time of 12 months is best for taste and quality. The quality of the frozen apples is maintained best in a very cold freezer (deep freezer), and one that keeps them frozen completely with no thaw cycles. Excluding any air from inside the bags which leads to freezer burn, by using vacuum-sealed bags, is also important to maintaining quality.


Looking for canning equipment and supplies?
Water bath canner with a jar rack
Pressure canners for gas, electric and induction stoves: Presto 23Qt or T-fal 22Qt
Canning scoop (this one is PERFECT)
Ball Blue book (most recent version)
Jars: 8oz canning jars for jams
Find Other types of farms:
Farm markets and roadside stands
Road trips and camping resources
Local Honey, apiaries, beekeepers
Consumer fraud and scams information
Home canning supplies at the best prices on the internet!
Maple Syrup Farms, sugarworks, maple syrup festivals
Environmental information and resources
Farms For Your Event for birthday parties, weddings, receptions, business meetings, retreats, etc.
Festivals - local fruit and vegetable festivals
Get the
most recent version of
the Ball Blue Book
