
Make Gourmet Chocolate-Covered Strawberries - Easily!
Click here for a PDF print version!
 Who doesn't
love chocolate covered strawberries? This commercial gourmet treat makes its appearance when strawberries are in season starting in January and continuing
through June. And that's perfect for holidays like Valentine's Day and Mother's Day. But did you know you can make your own? ? You can make better
chocolate cover strawberries than those that are made in a far off factory and shipped to you. Especially if you pick your own berries at a farm. And choose
your own chocolate. So here's how to do it. And I assure you, it's incredibly easy.
Who doesn't
love chocolate covered strawberries? This commercial gourmet treat makes its appearance when strawberries are in season starting in January and continuing
through June. And that's perfect for holidays like Valentine's Day and Mother's Day. But did you know you can make your own? ? You can make better
chocolate cover strawberries than those that are made in a far off factory and shipped to you. Especially if you pick your own berries at a farm. And choose
your own chocolate. So here's how to do it. And I assure you, it's incredibly easy.
Ingredients
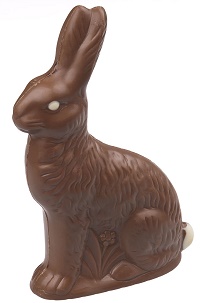
- Hard chocolate - Left over Easter bunnies are perfect, but you can use any chocolate that is hard at room temperature, like Hershey's
or Nestle. Stay away from thos that have fillings, soft centers, nuts, etc. Aside from that, use any chocolate you like: while, dark,
milk. I like Lindt chocolate Easter bunnies!
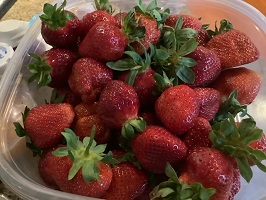
- Fresh Strawberries - of course, the fresher, the better, and obviously, you can't use frozen berries (they are mushy!).
Equipment
- Microwaveable bowl
- Spoon
- Shallow pan that will fit in your fridge
- Plastic wrap or wax paper
Step 1 - Get your berries
Pretty obvious. Wherever the come from, they need to be fresh, firm, ripe and without bruises.
Step 2 - Start the chocolate melting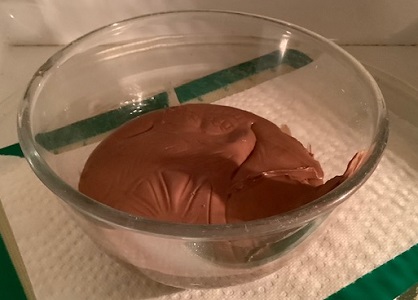
Best method is microwave in a glass bowl using the "melt butter setting" You can use a double boiler, or any method that gently metls the chocolate at a low temperature.
You only want the chocolate to be barely liquid, NOT hot!
Step 3 - Get the berries ready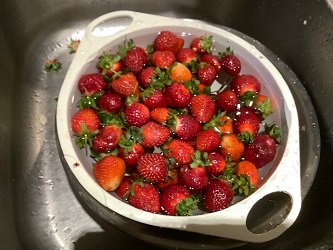
Wash the berries and allow them to drain. Then keep them in the fridge until you are ready to dip them.
Since we are cooking the filling separately, we need to quick bake the pie crust. . Preheat the oven to 350 degrees F. Line the pie crust with a circle of parchment paper and fill it with either pie weights, dried beans or rice to weigh down the dough. Bake the pie crust fro about for 15 minutes, then remove the parchment with the weights and bake for an additional 5 to 10 minutes or until it's a deep golden brown. Then remove from the oven and set aside to cool completely.
Step 4- Drain the berries
The chocolate adheres to the berries better if the surface of the berry is dry. I gently pick them up with a paper towel right before I dip them.
Step 5 - Line the pan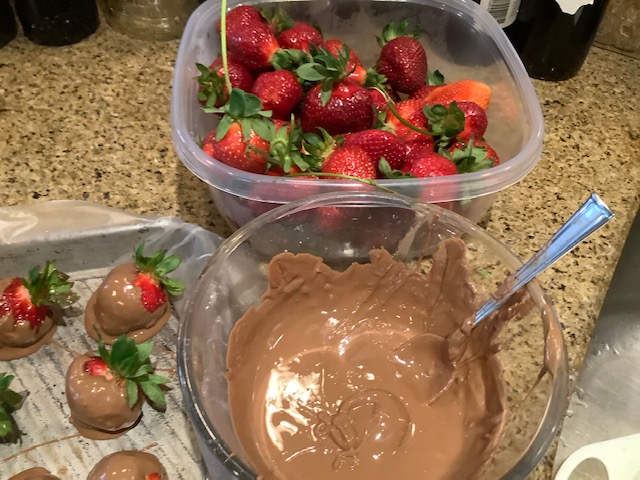
Line the pan or tray, which will fit in your fridge, with plastic wrap or wax paper.
Step 6 - Start dipping
Gently grasp the strawberries by the hull or stem, and dip it into the barely warm, just liquid chocolate
You can use a spoon to pour chocolate over any parts that don't get covered.
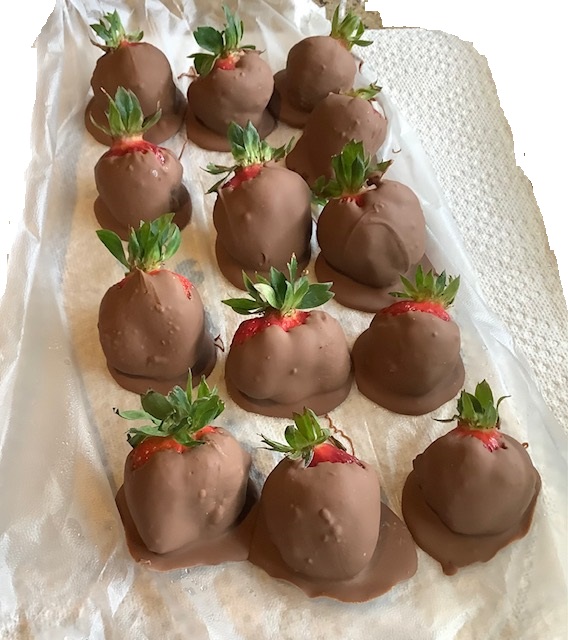
Step 7 - Set in the tray
Let the excess chocolate drain off for a couple of seconds, then set the berry on the plastic wrap in the tray.
Then stirring , reduce it until it starts to thicken.
Step 8 - Set the tray in the fridge
When the tray is full (berries shouldn't be touching each other) set it in the refrigerator.
Step 9 - Repeat until done
Step 10 - Allow the chocolate to harden
It only takes about an hour!
That's it, you're done! Enjoy!


Looking for canning equipment and supplies?
Water bath canner with a jar rack
Pressure canners for gas, electric and induction stoves: Presto 23Qt or T-fal 22Qt
Canning scoop (this one is PERFECT)
Ball Blue book (most recent version)
Jars: 8oz canning jars for jams
Find Other types of farms:
Farm markets and roadside stands
Road trips and camping resources
Local Honey, apiaries, beekeepers
Consumer fraud and scams information
Home canning supplies at the best prices on the internet!
Maple Syrup Farms, sugarworks, maple syrup festivals
Environmental information and resources
Farms For Your Event for birthday parties, weddings, receptions, business meetings, retreats, etc.
Festivals - local fruit and vegetable festivals
Get the
most recent version of
the Ball Blue Book
