
Looking for How to Freeze Eggplant - Easily! With Step-by-step Photos, Recipe, Directions, Ingredients and Costs in 2025? Scroll down this page and follow the links. And if you bring home some fruit or vegetables and want to can, freeze, make jam, salsa or pickles, see this page for simple, reliable, illustrated canning, freezing or preserving directions. There are plenty of other related resources, click on the resources dropdown above. If you are having a hard time finding canning lids, I've used these, and they're a great price & ship in 2 days.
If you have questions or feedback, please let me know! There are affiliate links on this page. Read our disclosure policy to learn more.
How to Freeze Eggplant - Easily! With Step-by-step Photos, Recipe, Directions, Ingredients and Costs
 How
to Freeze Eggplant
How
to Freeze Eggplant
(a.k.a., Aubergines)
Click here for a PDF print version
If you like frozen eggplant, like eggplant parmesan, in the winter, just imagine how good it would taste if you had picked a firm, fresh eggplants yourself and then quickly froze them at home! It is also one of the simplest ways to put up a vegetable for the winter. Here's how to do it, complete instructions in easy steps and completely illustrated. The eggplant will taste MUCH better than anything you've ever had from a store. And this page has a nice summary about how to grow eggplants in your own garden.
Directions for Freezing Eggplant
Ingredients
- fresh eggplant - any quantity. I figure one medium sized eggplant per serving (it does cook down)
- lemon juice (1/2 to 1 cup)
Equipment
- 1 Large pot of boiling water
- 2 large bowls, one filled with cold water and ice.
- 1 sharp knife
- Vacuum food sealer or "Ziploc" type freezer bags (the freezer bag version is heavier and protects better against freezer burn.
Instructions
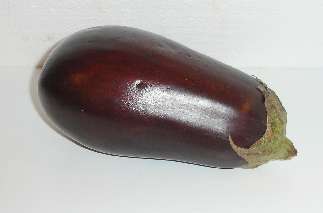
Step 1 - Get yer eggplant!
Start with fresh eggplant - as fresh as you can get. If there is
a delay between harvesting and freezing, put it in the refrigerator or put
ice on it. Harvest before the seeds become mature and when color is still
uniformly dark. Some varieties and size freeze better than others.
Like many vegetables, eggplants do become soft after freezing and shed
water as the cell walls rupture. The traditional black varieties hold up a
bit better than the purple Chinese and Thai types, but in many dishes
(like Indian baigan bharta) it won't matter.
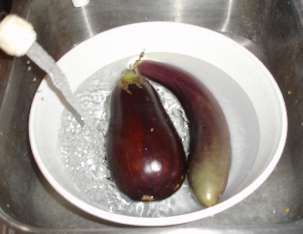
Step 2 - Wash the eggplant!
I'm sure you can figure out how to rinse the eggplant in plain cold water.
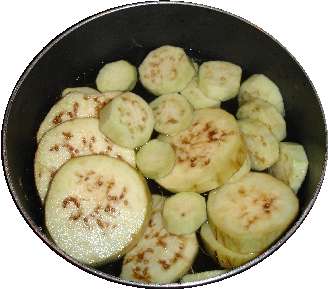
Step 3 - Peel and slice the eggplant
Just take a sharp knife and cut of both ends (about 1/4 of an inch, or half the width of an average woman's little finger). Then peel the eggplant - an ordinary vegetable peeler works best.
Step 4 - Slice the eggplant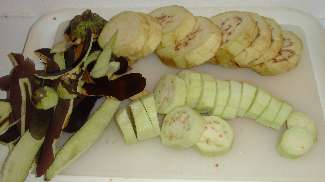
Slice 1/3-inch thick slices.
Prepare quickly, (if you leave it sit cut for more than a half hour, it will
start to discolor). Do enough eggplant for one blanching at a time.
Step 5 - Get the pots ready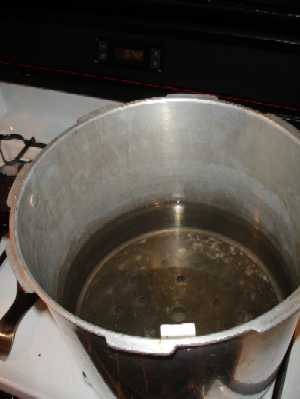
Get the pot of boiling water ready (about 2/3 filled), and add 1/2 cup of lemon juice to each gallon of water. Also get a LARGE bowl of ice and cold water ready to receive the eggplant after blanching.
Step 6 - Blanch the eggplant.
All fruits and vegetables contain enzymes and bacteria that, over time, break down the destroy nutrients and change the color, flavor, and texture of food during frozen storage. eggplant requires a brief heat treatment, called blanching, in boiling water or steam, to destroy the enzymes before freezing. Cook (blanch) the eggplant for 4 minutes.
Begin counting the blanching time as soon as you place the eggplant in the boiling water. Cover the kettle and boil at a high temperature for the required length of time. You may use the same blanching water several times (up to 5). Be sure to add more water from time to time to keep the water level at the required height.
Step 7 - Cool the eggplant
Remove the eggplants from the boiling water with a slotted spoon and
place in 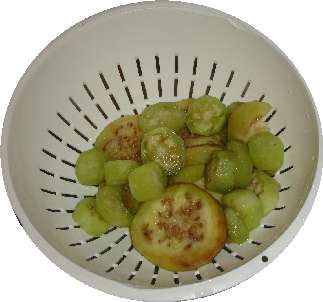 ice
water to cool for about 5 minutes (until cold).
ice
water to cool for about 5 minutes (until cold).
Cooling them quickly prevents overcooking. Keep adding more ice as needed.
Drain thoroughly (2 or 3 minutes)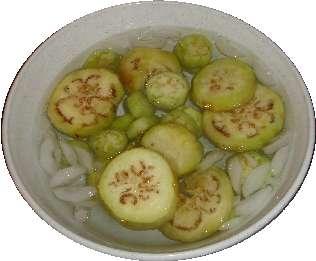
If you plan to make eggplant parmesan later, you can now batter dip the slices, coat them with bread crumbs wrap in wax paper and proceed to step 7.
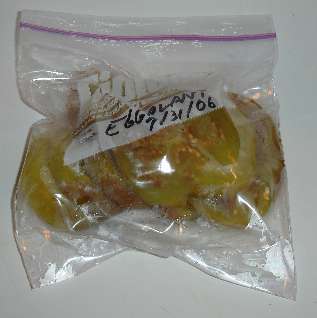
Step 7 - Bag the eggplant
I love the FoodSavers (see
this page for more information) with their vacuum 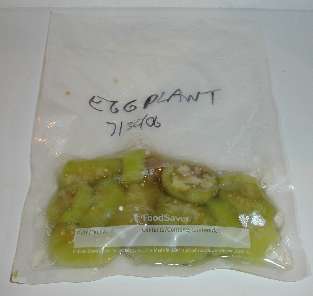 sealing!
I am not paid by them, but these things really work. If you don't
have one, ziploc bags work, too, but it is hard to get as much air out of
the bags. remove the air to prevent drying and freezer burn.
TIP: If you don't own a vacuum food sealer to freeze foods, place
food in a Ziploc bags, zip the top shut but leave enough space to insert
the tip of a soda straw. When straw is in place, remove air by sucking the
air out. To remove straw, press straw closed where inserted and
finish pressing the bag closed as you remove straw.
sealing!
I am not paid by them, but these things really work. If you don't
have one, ziploc bags work, too, but it is hard to get as much air out of
the bags. remove the air to prevent drying and freezer burn.
TIP: If you don't own a vacuum food sealer to freeze foods, place
food in a Ziploc bags, zip the top shut but leave enough space to insert
the tip of a soda straw. When straw is in place, remove air by sucking the
air out. To remove straw, press straw closed where inserted and
finish pressing the bag closed as you remove straw.
If you want slices for frying later; pack the drained slices with plastic wrap between slices. That will help to keep them from sticking to each other.
Note:
If the eggplant is very wet, after draining it, just put it in the food saver bag and freeze it (unsealed and upright) in your freezer. THEN, several hours later or the next day, when it is frozen, you can seal it with no mess!
Step 8 - Done!
Pop them into the freezer, on the quick freeze shelf, if you have one!
Tips:
- Harvest the eggplant at its peak maturity (firm, not limp or old)
- Process promptly after harvesting, or keep cooled in the fridge or with ice until then.
- This page has a recipe for Lemon-Dilled Eggplant and Summer Squash
Frequently Asked Questions
- How long can they be frozen?
It depends upon how cold is your freezer and how you packed them. Colder (deep freezes) are better than frost free compartments, which actually cycle above freezing (that's how they melt the ice). Vacuum packing results in longer storage capability, too. Thicker bags also help prevent freezer burn.
In general, up to 9 months in a ziploc bag in an ordinary freezer, and 14 months in a deep freeze in a vacuum packed bag. After that, they beans won't make you sick; they just won't taste as good.
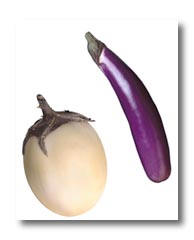
Eggplant Varieties
Large Oval Fruit
Dusky (60 days to harvest, good size, early production)
Epic (64 days, tear-drop shaped)
Black Bell (68 days, round to oval, productive)
Black Magic (72 days)
Classic (76 days, elongated oval, high quality)
Black Beauty (OP-80 days)
Burpee Hybrid (80 days)
Ghostbuster (80 days; white, slightly sweeter than purple types; 6 to 7 inch oval).
Elongated Fruit
Ichiban (70 days)
Slim Jim (OP-70 days; lavender, turning purple when peanut-sized; good in pots)
Little Fingers (OP-68 days; 6 to 8 inch, long, slim fruit in clusters).
Ornamental Fruit
Easter Egg (52 days; small white, egg-sized, shaped, turning yellow at maturity; edible ornamental)
Comments and Tips from Visitors
- Freezing on a cookie rack: "Thanks for all the great info on this site. Re: freezing eggplant - after blanching and drying it a bit, I put it on a rack over a cookie tray in the freezer before packing in serving size and sealing in vacuum sealer. I did the same thing with my green beans - freeze first and then seal.(This is my first year using the vacuum seal, so I may be going a little overboard!) Thanks for all the advice. Lorraine"


Looking for canning equipment and supplies?
Water bath canner with a jar rack
Pressure canners for gas, electric and induction stoves: Presto 23Qt or T-fal 22Qt
Canning scoop (this one is PERFECT)
Ball Blue book (most recent version)
Jars: 8oz canning jars for jams
Find Other types of farms:
Farm markets and roadside stands
Road trips and camping resources
Local Honey, apiaries, beekeepers
Consumer fraud and scams information
Home canning supplies at the best prices on the internet!
Maple Syrup Farms, sugarworks, maple syrup festivals
Environmental information and resources
Farms For Your Event for birthday parties, weddings, receptions, business meetings, retreats, etc.
Festivals - local fruit and vegetable festivals
Get the
most recent version of
the Ball Blue Book
