
Looking for How to Freeze Corn - Easily! With Step-by-step Photos, Recipe, Directions, Ingredients and Costs in 2025? Scroll down this page and follow the links. And if you bring home some fruit or vegetables and want to can, freeze, make jam, salsa or pickles, see this page for simple, reliable, illustrated canning, freezing or preserving directions. There are plenty of other related resources, click on the resources dropdown above. If you are having a hard time finding canning lids, I've used these, and they're a great price & ship in 2 days.
If you have questions or feedback, please let me know! There are affiliate links on this page. Read our disclosure policy to learn more.
How to Freeze Corn - Easily! With Step-by-step Photos, Recipe, Directions, Ingredients and Costs
How to Freeze Corn - From Corn on the Cob!
Click here for a PDF print version
If you like frozen niblets-type corn in the winter, just imagine how good it would taste if you had picked a couple of dozen ears yourself, or bought a couple dozen fresh ears from a farm stand and then quickly froze it at home! It is also one of the simplest ways to put up a vegetable for the winter. Here's how to do it, complete instructions in easy steps and completely illustrated. The corn will taste MUCH better than anything you've ever had from a store. These directions are for corn which you will cut off the cob. If you want directions for freezing corn ON the cob, click here. Personally, I think you will get better results and use less freezer space with it OFF the cob.
Directions for Freezing Corn
Ingredients and Equipment
- fresh corn on the cob - any quantity. I figure 1.5 ears per serving.
- 1 Large pot of boiling water
- Plenty of ice - about 1 tray per ear.
- Vacuum food sealer or "ziploc" type freezer bags (the freezer bag version is heavier and protects better against freezer burn.
- 2 large bowls, one filled with cold water and ice.
- 1 sharp knife
- 1 Large spoon
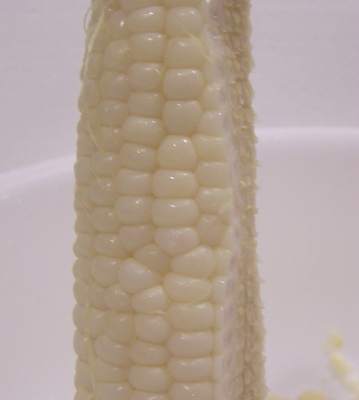
The photo at right shows an i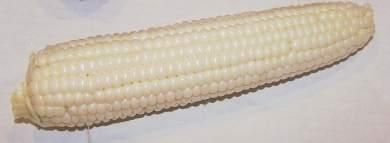 deal
ear - ripe but not bloated. The kernels are still tender
(easily punctured with your fingernail) and the juice is milky).
White, yellow or bicolor types are all fine!
deal
ear - ripe but not bloated. The kernels are still tender
(easily punctured with your fingernail) and the juice is milky).
White, yellow or bicolor types are all fine!
Instructions
Step 1 - Get yer corn!
Start with fresh corn on the cob - as fresh as you can get. If there is a delay between harvesting and freezing, put it in the refrigerator or put ice on it. The sugars break down quickly at room temperature.
Step 2 - Get the pots ready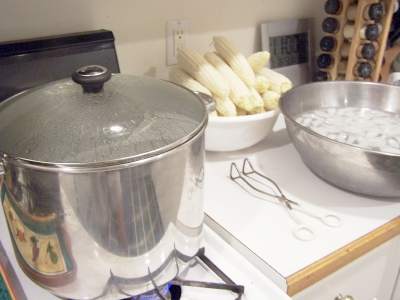
Get the largest pot you have (I use my canner) filled 3/4 full with hot water, put it on your largest burner (or straddle two burners) and get it heating to a full rolling boil..
Next, get a LARGE bowl filled with ice and cold water. You may need to buy a bag or two of ice if you are planning to do more than a dozen ears of corn.Step 3 - Husk the corn
Husk the corn and pick off as much of the silk as you can. A
soft vegetable brush is the fastest and easiest way to get the remaining
silk off - just don't be too rough with it.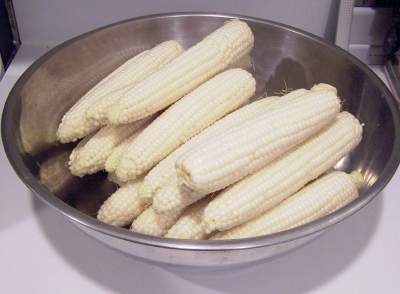
Step 4 - Blanch the corn. 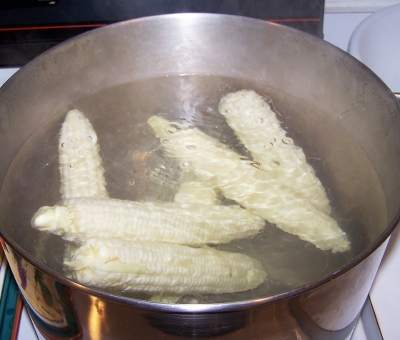
All fruits and vegetables contain enzymes that, over time, break down the destroy nutrients and change the color, flavor, and texture of food during frozen storage. Corn requires a brief heat treatment, called blanching, in boiling water or steam, to destroy the enzymes before freezing. Blanching times generally vary from one to 10 minutes, depending on the vegetable. The duration should be just long enough to stop the action of the enzymes. See the note below for updates
Begin counting the blanching time as soon as you place the corn in the boiling water, noting that the water ought to return to a boil in a minute or less. If it takes several minutes or more to return to a boil, you are using too small a pot or adding too much corn.
Cover the kettle and boil at a high temperature for the required length of time. You may use the same blanching water several times (up to 5). Be sure to add more hot water from the tap from time to time to keep the water level at the required height.
Blanching time varies depending on the type of frozen corn you are making: cut-whole kernel, cream style or corn-on-the-cob:
Blanching times, for freezing the corn:
-
Whole Kernel Corn - 3 to 4minutes.
-
Cream style corn - 3 to 4 minutes.
Note: It's my opinion that best results come from whole kernel or cream style. Personally, I don't recommend freezing it on the cob: it takes up too much space in the freezer, and gets too mushy.
Blanching notes:
UC Davis research has shown that super sweet varieties typically require a 4 min blanch. Their point being, it is easy to OVER-blanch super sweet corn. In my own experience, I've found that blanching for 2 to 3 minutes is optimal, even as little as 1 or 2 minutes if you are going to eat the corn within 3 or 4 months. The blanching step is ONLY to stop the action of enzymes that degrade the flavor - it is not a safety step, so less is better than more in this case! Especially with super sweet varieties - as one farmer (Vaughan Farm's Produce) points out, the sugars can caramelize (breakdown) if you blanch too long.
Some people skip blanching and report excellent results. I still blanch for 3 minutes, and use that as a cleaning step and to slow some enzymes.
Step 5 - Cool the corn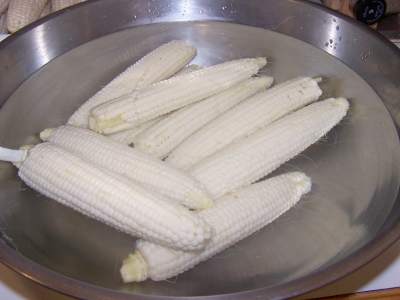
Cool corn immediately in ice water. Drain the corn thoroughly.
After vegetables are blanched, cool them quickly to prevent overcooking. Plunge the corn into a large quantity of ice-cold water (I keep adding more ice to it). A good rule of thumb: Cool for the same amount of time as the blanch step. For instance, if you blanch sweet corn for 7 minutes, then cool in ice water for 7 minutes.
Drain thoroughly.
Step 6 - Cut the kernels from the cob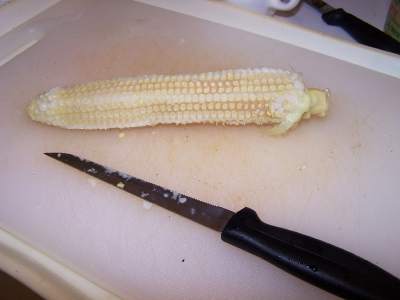
Obviously, if you are freezing the corn on the cob, skip this step.
Whole Kernel Corn - Cut kernels from cob about 2/3 the depth of the kernels. I hold the ear by the small end, and slide the knife down the ear. see the next photo.
Cream Style Corn - Cut kernel tips about 1/2 deep and scrape the cobs with the back of a knife to remove the juice and the heart of the kernel.
Another way to prepare cream style corn for freezing is to cut and scrape the corn from the cob without blanching. Place the cut corn in a double boiler, and heat with constant stirring for about 10 minutes or until it thickens; allow to cool by placing the pan in ice water.
 |
You don't need a special tool, just a very sharp knife! However, a number of people wrote in to point out that they prefer one of the tools below, as do I, often because it is easier for them due to arthritis, or simply faster. See here for related tools, equipment, supplies on Amazon See here for related tools, equipment, supplies on Amazon See here for related tools, equipment, supplies on Amazon Tip from a visitor: "When cutting corn off the cob, put stem in a Bundt pan and cut with electric knife." |
| As the corn piles up in your bowl, it will look like this! | 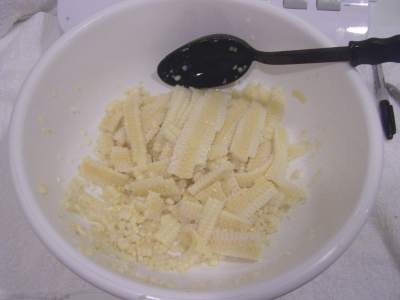 |
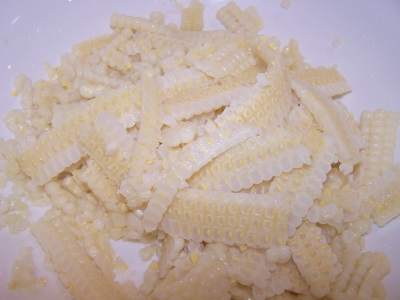 |
Close up, the corn comes off in strips. As you put these in
the bag, they will easily separate into separate kernels. Tip: A number of people have written in to point out that you can use a Bundt pan or Angel Food cake pan to hold the corn: When removing corn from the cob after blanching, just put the pointed end of the ear into the hole in the middle of a Bundt pan or an angel food pan and cut. The kernels will fall nicely into the pan for easy removal. " |
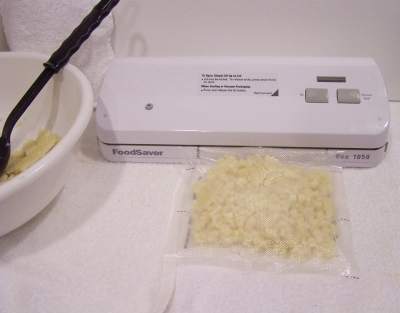
Step 7 - Bag the cornI love the FoodSavers (see this page for more information) with their vacuum sealing! I am not paid by them, but these things really work. If you don't have one, ziploc bags work, too, but it is hard to get as much air out of the bags. remove the air to prevent drying and freezer burn. |

See here for related tools, equipment, supplies on Amazon
|
 |
A vacuum-sealed FoodSaver bag is on top at left. You can see how the
FoodSaver really sucks out all the air, so the corn won't dry out or get
freezer burn. That means the food inside will last many times longer. I've
been using them (and their predecessor in the marketplace, Seal-a-Meal) for
many years. If you're interested,
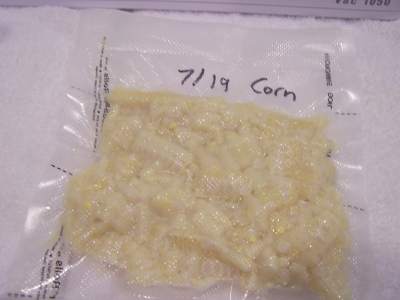
here's where you can get one. If you don't have one, Ziploc bags work, too, but it is hard to get as much air out of the bags. remove the air to prevent drying and freezer burn. One person wrote to tell me that she uses a straw and seals the Ziploc around the straw to suck the air out of the bag, then pinches the straw and quickly removes it while pressing the seal. It works fairly well, but I'll stick to the Foodsaver, since the bags are microwaveable and much thicker than a Ziploc bag (even the Ziploc "freezer bags") Step 8 - Label the bags!"Sharpie" marking pens work well on plastic and won't rub off.
|
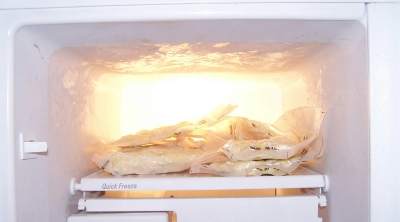
Step 9 - Done!Pop them into the freezer, on the quick freeze shelf, if you have one! Later, when you are ready to serve the corn, it just takes about 3 or 4 minutes in the microwave (from frozen) or in the top of a double boiler. It doesn't need to be "cooked", just heated up! Freezing keeps corn safe to eat almost indefinitely, but the recommended maximum storage time of 12 months is best for taste and quality. The quality of the frozen corn is maintained best in a very cold freezer (deep freezer), and one that keeps them frozen completely with no thaw cycles. Excluding any air from inside the bags which leads to freezer burn, by using vacuum-sealed bags, is also important to maintaining quality |
 |
Tips:
- Harvest early in the morning, especially if the weather is hot, to get peak flavor.
- Harvest the corn at its peak maturity (milky fluid in the kernels, kernels tender, and not bloated). Immature corn is watery when cooked and over-ripe corn is chewy and doughy.
- Process promptly after harvesting, or keep cooled in the fridge or with ice until then.
Frequently Asked Questions
Q. I didn't know about the blanching step and I already froze my corn? Is that dangerous? Should I take the corn out of the freezer and blanch it and re-freeze it?No, there is no health or safety problem. Blanching is done to preserve the flavor and sweetness. In fact, if you eat the corn in a matter of weeks, you probably wouldn't notice the difference. It becomes most noticeable (much less tasty and sweet) after months in the freezer, if it hadn't been blanched.
Q. I'm freezing corn on the cob tomorrow. Is it possible to "steam" in a crab pot vs. boiling in water? If so, what adjustment to the blanching time should I make?
A. Great question. You can steam blanch most vegetables, although water is generally preferred. Heating in steam is recommended for a few vegetables, and for broccoli, pumpkin, sweet potatoes and winter squash, both steaming and boiling are satisfactory methods.
Steam blanching takes about 11/2 times longer than water blanching. Water blanching provides greater enthalpy, means more effective and rapid heating, thus steam blanching takes longer.
To steam, use a pot with a tight lid and a basket that holds the food at least three inches above the bottom of the pot. Put an inch or two of water in the pot and bring the water to a boil.
Put the vegetables in the basket in a single layer so that steam reaches all parts quickly. Cover the pot and keep heat high. Start counting steaming time as soon as the lid is on.
| Type of Corn | Blanching time in water | Blanching time in steam |
| Corn-on-the-cob
|
||
| Small Ears | 7 minutes | 11 |
| Medium Ears | 9 | 14 |
| Large Ears | 11 | 17 |
| Whole Kernel or Cream Style (note: the ears are blanched before cutting corn from cob) | 4 | 6 |
Q. I have tried to use a vacuum sealer to seal my corn for freezing but the juice of the corn is pulled from the kernel preventing my food-saver from sealing the bag. Any suggestions?
A. Yep! Some corn is juicier than others! In that case, just fill the bag with the corn kernels, and pop it into the freezer, unsealed. Wait a few hours, or overnight, until it is frozen; then take it out and vacuum seal it!
Q. My sister brought me sweet corn from California where she just moved from. She asked the farmer what is the best way to freeze the cobs and he told her that his family just cut the over-growth and ends and freeze the whole cob within the cobs and silk. I did this because of the fact it took her 3 days driving in hot temps outside so I had to do something quick. I always would clean and remove the silk and then blanch for over 5 minutes and cool in ice water then I would use the food saver vacuum sealer. By not blanching will this be harmful to eat after being frozen and vacuum sealed without blanching?
A. No, there's no health risk; the corn just will not maintain the quality of its flavor and appearance as long in the freezer. It may have noticeably less flavor after weeks rather than months.
Q. When freezing sweet corn you say to start counting blanch time when you put cobs in the boiling water then boil for 4 minutes. I know that when I cook corn on the cob I put the cobs in boiling water and it takes 4 to 5 minutes before it starts boiling again, so my question is does the blanch time actually require the water to be boiling?
Yes, the temperature ought to be back up to boiling before starting the timer, if it takes more than 1 minute to return to a boil.
There's another problem at work though. If it takes that long (several minutes or more) for the water to get back to boiling, that indicates that the volume of water is too small, relative to the amount of corn added. The corn is cooling the water too much. Those of you who are physicists or thermodynamicists will recognize the problem of enthalpy here. While the water isn't at the boiling point, it's still heating the corn, which may result in loss of flavor and sugar due to overcooking.
The solution is to use a substantially larger pot, or put much less corn in each batch - or both - so the water returns to boiling in a minute or so.
Comments and Tips
- Comments from a visitor on August 15, 2009: "Hi, I just wanted to share that we use an electric knife to remove the blanched corn from the cob. It is the easiest quickest way we have found for this part of the process. Last night we processed 10 dozen ears of corn in two hours. Please pass it on. My 80 year old grandma taught me this trick! Thanks, kim"


Looking for canning equipment and supplies?
Water bath canner with a jar rack
Pressure canners for gas, electric and induction stoves: Presto 23Qt or T-fal 22Qt
Canning scoop (this one is PERFECT)
Ball Blue book (most recent version)
Jars: 8oz canning jars for jams
Find Other types of farms:
Farm markets and roadside stands
Road trips and camping resources
Local Honey, apiaries, beekeepers
Consumer fraud and scams information
Home canning supplies at the best prices on the internet!
Maple Syrup Farms, sugarworks, maple syrup festivals
Environmental information and resources
Farms For Your Event for birthday parties, weddings, receptions, business meetings, retreats, etc.
Festivals - local fruit and vegetable festivals
Get the
most recent version of
the Ball Blue Book
