
Looking for How to Freeze Summer Squash - Easily! With Step-by-step Photos, Recipe, Directions, Ingredients and Costs in 2025? Scroll down this page and follow the links.
And if you bring home some fruit or vegetables and want to can, freeze, make
jam, salsa or pickles, see this
page for simple, reliable, illustrated canning, freezing or preserving
directions. There are plenty of other related resources, click on the resources dropdown above. If you are having a hard time
finding
canning lids, I've used these, and they're a great price &
ship in 2 days.
If you have questions or feedback, please let me know! There
are affiliate links on this page. Read our disclosure policy to learn more.
How to Freeze Summer Squash - Easily! With Step-by-step Photos, Recipe, Directions, Ingredients and Costs
How to Freeze Summer Squash (Zucchini, Yellow Squash,
Crookneck, Pattypan, Straightneck, White Scallop, etc.)
Click here for a PDF print version
If you like frozen squash in the winter, just imagine how good it would taste
if you had picked a firm, fresh squashes yourself and then quickly froze them at
home! It is also one of the simplest ways to put up a vegetable for the
winter. Here's how to do it, complete instructions in easy steps and completely
illustrated. The squash will taste MUCH better than anything you've ever had
from a store. If you want
to freeze the squash
already breaded and ready to cook, see this page. And you might like this recipe, too:
How to make Grilled Summer
Squash with Feta - which you can freeze for the winter, or serve fresh!
Directions for Freezing squash
Ingredients
- fresh summer squash - any quantity. I figure one medium sized
squash per serving (it does cook down)
Equipment
-
Vacuum food sealer or "ziploc" type freezer bags (the freezer bag
version is heavier and protects better against freezer burn.
- 1 Large pot of boiling water
- 2 large bowls, one filled with cold water and ice.
- 1 sharp knife
Directions for Freezing Summer Squash
Step 1 - Get the squash!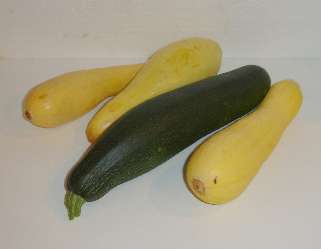
Start with fresh squash - as fresh as you can get. If there is a
delay between harvesting and freezing, put it in the refrigerator or put
ice on it. Harvest before the seeds become mature and when color is still
uniformly dark
Step 2 - Wash the squash!
I'm sure you can figure out how to rinse the squash in
plain cold or lukewarm water using your hands and possibly a gentle
brush..
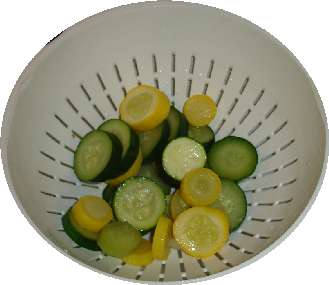
Step 3 - Slice the squash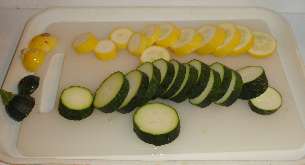
Just take a sharp knife and cut of both ends (about 1/4 of an inch, or
half the width of an average woman's little finger)
Slice 1/2-inch thick
slices.
Prepare quickly, (if you leave it sit out cut up for more than a half
hour, it will start to discolor). Do enough squash for one blanching at
a time.
NOTE: If you want grated zucchini for later baking, instead of
slicing them, grate them. Then instead of water blanching them, steam
blanch them in small quantities 1 to 2 minutes until translucent. Pack
in measured amounts into containers, leaving 1/2-inch headspace. Cool by
placing the containers in cold water. Seal and freeze.
Step 4 - Get
the pots ready
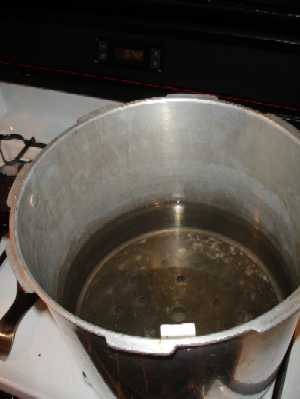 Get
the pot of boiling water ready (about 2/3 filled). Also get a LARGE bowl
of ice and cold water ready to receive the squash after blanching.
Get
the pot of boiling water ready (about 2/3 filled). Also get a LARGE bowl
of ice and cold water ready to receive the squash after blanching.
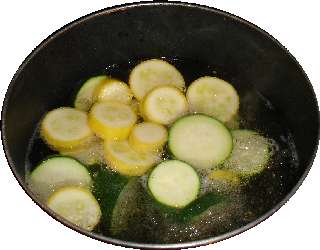
Step 5 - Blanch the squash.
All fruits and vegetables contain enzymes and bacteria
that, over time, break down the destroy nutrients and change the color,
flavor, and texture of food during frozen storage. squash requires a brief
heat treatment, called blanching, in boiling water or steam, to
destroy the enzymes before freezing.
Cook (blanch) the squash for 3
minutes.
Begin counting the blanching time as soon as you place the
squash in the boiling water. Cover the kettle and boil at a high
temperature for the required length of time. You may use the same
blanching water several times (up to 5). Be sure to add more hot water
from the tap from time to time to keep the water level at the required
height.
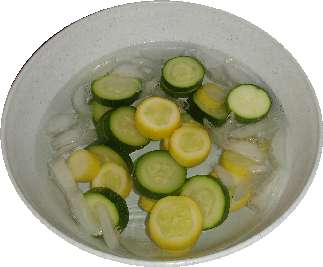
Step 6 - Cool the squash
 Remove
the squash from the boiling water with a slotted spoon and place in ice
water to cool for about 5 minutes (until cold).
Remove
the squash from the boiling water with a slotted spoon and place in ice
water to cool for about 5 minutes (until cold).
Cooling them quickly prevents overcooking. Keep adding more ice as
needed.
 Drain
thoroughly (2 or 3 minutes)
Drain
thoroughly (2 or 3 minutes)
Step 7 - bag the squash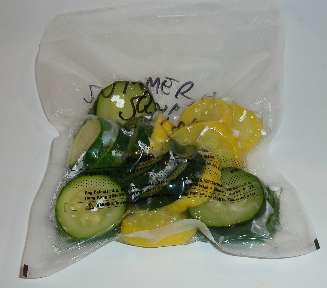
I love the FoodSavers (see
this page for more information) with their vacuum sealing! I am
not paid by them, but these things really work. If you don't have
one, ziploc bags work, too, but it is hard to get as much air out of the
bags. remove the air to prevent drying and freezer burn.
TIP: If you don't own a vacuum food sealer to freeze foods, place
food in a Ziploc bags, zip the top shut but leave enough space to insert
the tip of a soda straw. When straw is in place, remove air by sucking the
air out. To remove straw, press straw closed where inserted and
finish pressing the bag closed as you remove straw.
Note:
 If
the squash is very wet, after draining it, just put it in the food saver
bag and freeze it (unsealed and upright) in your freezer. THEN, several
hours later or the next day, when it is frozen, you can seal it with no
mess!
If
the squash is very wet, after draining it, just put it in the food saver
bag and freeze it (unsealed and upright) in your freezer. THEN, several
hours later or the next day, when it is frozen, you can seal it with no
mess!
Step 8 - Done!
Pop them into the freezer, on the quick freeze shelf, if you have one!
Freezing keeps summer squash safe to eat almost indefinitely, but the
recommended maximum storage time of 12 months is best for taste and quality. The
quality of the frozen summer squash is maintained best in a very cold
freezer (deep freezer), and one that keeps them frozen completely with no
thaw cycles. Excluding any air from inside the bags which leads to freezer
burn, by using vacuum-sealed bags, is also important to maintaining
quality
To later use the squash
Any frozen vegetable will be mushy when thawed, so obviously it's best to use
in cooking, rather than attempting to use it raw.
You can let it thaw in the
refrigerator, the microwave's defrost setting or just add t frozen to
cooking.
I like to use it as a sauteed vegetable, so I partially thaw it, then sautee
it in a pan with onions, red peppers and some seasoning (like Mrs. Dash or
Herbes d' Provence)
Tips:
- Harvest the squash at its peak maturity (firm, not limp or old)
- Process promptly after harvesting, or keep cooled in the fridge or with
ice until then.
- If the squash is watery when thawed, discard the liquid before using.
- An alternative method is to cook the squash first - using your favorite
recipe for a zucchini casserole, or sauteed squash, etc., and then simply
freeze the cooked squash! Of course, it does take up more room in your
freezer.
I love the FoodSavers (see
this page for more information) with their vacuum sealing! Here's an
example of one model:
FoodSaver V2840 Advanced Design
This one is the least expensive of the Food Saver models that has all the
advamced features, like automatic bag detection and sealing, which makes it
faster and easier to seal. And yes, you can seal and freeze foods with
liquids (just freeze the unsealed bag in the freezer overnight, THEN seal
it!)

About $135
 
Features
- Home vacuum-packaging system vacuums, seals, and shuts off
automatically
- Upright vacuum-sealing
appliance with SmartSeal technology keeps food fresh longer
-
Push-button operation;
built-in roll storage and cutter; automatic liquid detection
-
Crush-free instant seal;
2 vacuum speeds; 2 seal levels; progress lights; integrated
bag opener
-
Marinate and canister
modes; includes 3 quart-size bags, 2 gallon-size bags, and a
roll of bag material
-
Measures approximately 6
by 18-8/9 by 10-2/5 inches; 1-year limited warranty
|
Frequently Asked Questions
- How long can they be frozen?
It depends upon how cold is your freezer and how you packed them. Colder
(deep freezes) are better than frost free compartments, which actually cycle
above freezing (that's how they melt the ice). Vacuum packing results in
longer storage capability, too. Thicker bags also help prevent freezer
burn.
In general, up to 9 months in a ziploc bag in an ordinary freezer, and 14
months in a deep freeze in a vacuum packed bag. After that, they beans
won't make you sick; they just won't taste a s good.
- Hi, I have a question about yellow squash. I am a newby to growing
gardens but last year I did as said about the yellow squash (to freeze it).
I have a vacuum sealer (love it). But when I pulled a package of squash out
to eat it, it was so soggy. I also tried blanching for about a minute but it
was all the same. When I take it out of the freezer I just warm the whole
bag in water then open it. Just soggy. We like to eat it somewhat firm. I
was told to just wash it, cut the ends off and freeze it. Is this safe?
Yes, you can certainly freeze it without blanching. The purpose of blanching
prior to freezing is to stop the enzymes that degrade the flavor, it's not
for safety. As long as you eat the squash within 4 to 6 months, the flavor
should be ok. Freezing without blanching may reducing the sogginess of the
of the squash, but I doubt that it will help much. Freezing ruptures the
cell walls and that is primarily what causes the sogginess.
I blanch if I am going to store them for a long time or use it in
cooking. If I want to use a vegetable raw, and not keep it frozen for more
than a few months, then I skip the blanching, too. But it still nowhere near
as crisp as fresh.
- Why is canning summer squash or zucchini no longer
recommended by the USDA?
Recommendations for canning summer squashes, including zucchini, that
appeared in former editions of USDA guides have been withdrawn due to
uncertainty about the determination of processing times. Squashes are
low-acid vegetables and require pressure canning for a known period of time
that will destroy the bacteria that cause botulism. Documentation for the
previous processing times cannot be found, and reports that are available do
not support the old process. Slices or cubes of cooked summer squash will
get quite soft and pack tightly into the jars. The amount of squash filled
into a jar will affect the heating pattern in that jar. It is best to freeze
or pickle summer squashes, but they may also be dried.
Comments and Feedback
- Comments from a visitor on August 16, 2014: "Thank you so much for posting the instructions on how
to freeze summer squash. Very glad that I choose your website. Didn't know what
I was going to do with all the squash my husband brought home from his cousin's
garden. I just made a delicious chocolate zucchini cake and I froze the rest of
the squash for the future after following your prefect instructions. Genius ! "


