Looking for How to Make Chili Con Carne (Chili with Meat) - Easily! With Step-by-step Directions, Photos, Ingredients, Recipe and Costs in 2025? Scroll down this page and follow the links. And if you bring home some fruit or vegetables and want to can, freeze, make jam, salsa or pickles, see this page for simple, reliable, illustrated canning, freezing or preserving directions. There are plenty of other related resources, click on the resources dropdown above. If you are having a hard time finding canning lids, I've used these, and they're a great price & ship in 2 days.
If you have questions or feedback, please let me know! There are affiliate links on this page. Read our disclosure policy to learn more.
How to Make Chili Con Carne (Chili with Meat) - Easily! With Step-by-step Directions, Photos, Ingredients, Recipe and Costs
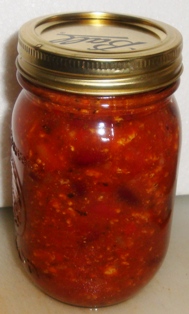 How to Make and Can Chili Con Carne (Chili with Meat) - Easily!
Yield: 7 to 9 pint jars
Click here for a PDF print version
Making and canning your own Chili Con Carne is easy and safe with this recipe. It closely follows the USDA's tested recipe for safety, and I explain what you can modify safely!
Ingredients
Yield: 9 pints
- 3 cups dried pinto or red kidney beans
- 5-1/2 cups water
- 5 teaspoons salt (separated)
-
3 lbs
ground beef, chicken or turkey
- 1-1/2 cups chopped onion
- 1 cup chopped peppers of your choice (optional)
- 1 teaspoon black pepper
- 3 to 6 tablespoons chili powder
- 2 tablespoons cumin (seed or powder)
- 2 teaspoons oregano
- 2 quarts crushed or whole tomatoes
- 2 tablespoons lemon or lime juice
Modifications You can substitute the spices. For example, You could add 1 tablespoon of Tabasco sauce or other hot sauce, add a couple more tablespoons of chili powder (or use less). You can reduce or omit the onions or peppers, but don't add more of them.
Equipment
- 1 Pressure Canner (a large pressure pot with a lifting rack to sanitize the jars after filling (about $75 to $200 at mall kitchen stores and "big box" stores, but it is cheaper online; see this page for more information). For low acid foods (most vegetables, you can't use an open water bath canner, it has to be a Pressure Canner to get the high temperatures to kill the bacteria. If you plan on canning every year, they're worth the investment.
- Jar grabber (to pick up the hot jars)
- Jar funnel ($4 at mall kitchen stores and local "big box" stores, but it's usually cheaper online from our affiliates)
- At least 1 large pot
- Colander or sieve
- Large spoons and ladles,
- Canning jars (often called Ball jars, Mason jars or Kerr jars) (Publix, Kroger, other grocery stores and some "big box" stores carry them - now about $12 per dozen quart jars (up 50% in 2 years!) including the lids and rings)
Canning Chili Directions - Step by Step
Step 1 - Prepare the jars and pressure canner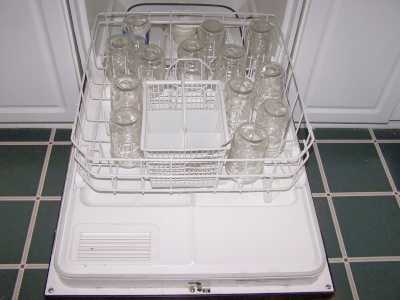
Wash the jars and lids
This is a good time to get the jars ready! The dishwasher is fine for the jars; especially if it has a "sanitize" cycle. Otherwise put the jars in boiling water for 10 minutes. I just put the lids in a small pot of almost boiling water for 5 minutes, and use the magnetic "lid lifter wand" (available from target, other big box stores, and often grocery stores; and available online - see this page) to pull them out.
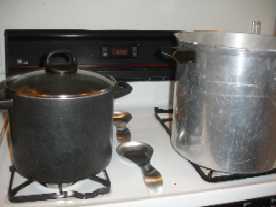
Get the pressure canner heating up
Rinse out your pressure canner, put the rack plate in the bottom, and fill it to a depth of 4 inches with hot tap water. (of course, follow the instruction that came with the canner, if they are different). Put it on the stove over low heat, with the lid OFF of it, just to get it heating up for later on.
Step 2 - Wash and soak the beans
Wash beans thoroughly and place them in a 2 qt saucepan. Add cold water
to a level of 2 to 3 inches above the beans and soak 12 to 18 hours. Drain
and discard water.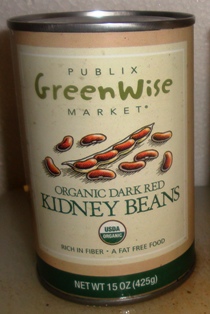
OR use drained, rinsed canned beans.
Step 3 -
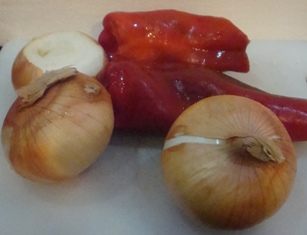
 Chop
the onions, peppers and tomatoes
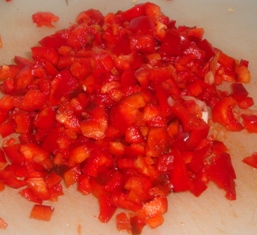
Chop
the onions, peppers and tomatoes
I dice the onions and peppers into small pieces, about 1/4 inch (1/2 cm), and the tomatoes I leave in larger pieces, around 1 inch (2.5 cm).
Step 4 - Boil the beans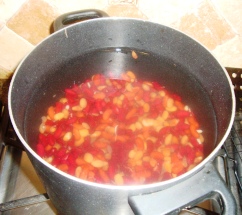
Combine the beans with 5-1/2 cups of fresh water, and 2 teaspoons salt. Bring to a boil.
Reduce the heat and simmer for 30 minutes.
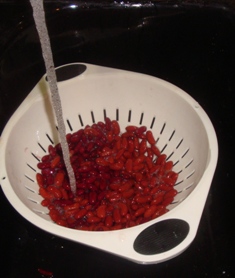
St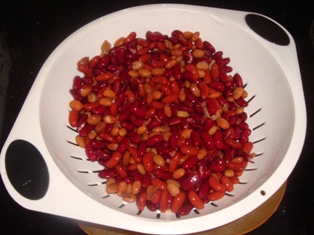 ep 5 -
Drain the beans
ep 5 -
Drain the beans
Drain and discard the water.
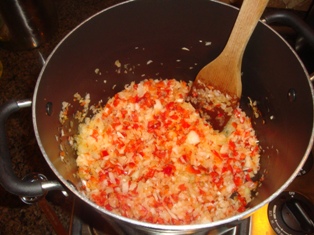 Step 6 -
Brown the onions and peppers
Step 6 -
Brown the onions and peppers
Brown the chopped onions and peppers in a pan with 1 tablespoon of vegetable oil, if needed, to avoid burning!
o:p>
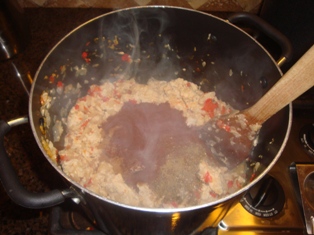
Step 7 - Add the meat to the pot
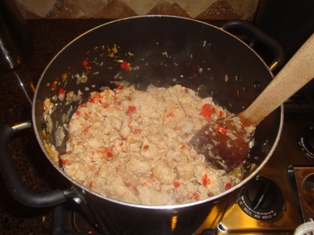 Now,
brown the meat (ground beef, ground chicken or ground turkey),
along with the chopped onions, and peppers, (the onions and/or
peppers are optional), in a skillet.
Now,
brown the meat (ground beef, ground chicken or ground turkey),
along with the chopped onions, and peppers, (the onions and/or
peppers are optional), in a skillet.
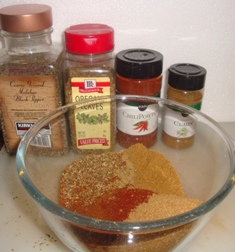
Step 8 -
 Drain
the fat and add the spices
Drain
the fat and add the spices
Drain off the fat (I put it in a colander or sieve and let it drain in a pan in the sink). Put the pot back on the stove and add the spices.
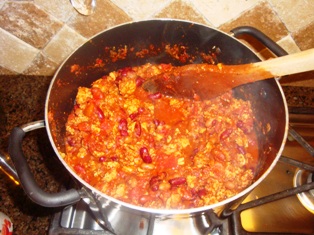 Step 9 -
Add the chopped tomatoes, beans and lemon or lime juice and heat for 5
minutes
Step 9 -
Add the chopped tomatoes, beans and lemon or lime juice and heat for 5
minutes
Put the drained, cooked beans and the drained browned meat in a large pot. Add the, lemon or lime juice and the drained, cooked beans. Simmer for 5 minutes, so everything is heated thoroughly. Caution: Do not add starch or other thickeners.
Step 10 -
Fill the jars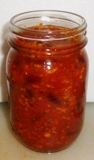
Fill jars, leaving 1-inch headspace. Adjust lids and tighten the bands, gently, by hand.
Step 11 - Put the lids and rings on
Put the lids on each jar and seal them by putting a ring on and screwing it down snugly (but not with all your might, just "snug").
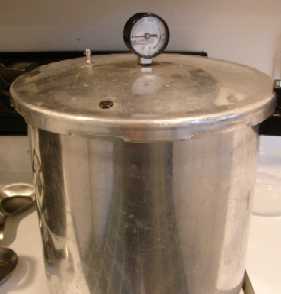
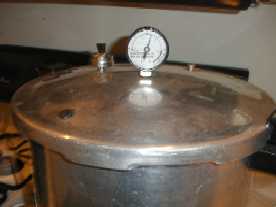
Step 12 - Put the jars in the canner and the lid on the canner (but still vented)
Using the jar tongs, put the jars on the rack in the canner. By now the water level has probably boiled down to 3 inches. If it is lower than that, add more hot tap water to the canner. When all the jars that the canner will hold are in, put on the lid and twist it into place, but leave the weight off (or valve open, if you have that type of pressure canner).
 Step
13 - Let the canner vent steam for 10 minutes
Step
13 - Let the canner vent steam for 10 minutes
Put the heat on high and let the steam escape through the vent for 10 minutes to purge the airspace inside the canner.
Step 14 - Put the weight on and let the pressure build
After 10 minutes of venting, put the weight on and close any openings to allow the pressure to build to 11 pounds.
Step 15 - Process for minutes
Once the gauge hits 10 or 11 pounds (depending on the type of canner , see the tables below), start your timer going - for 75 minutes. Adjust the heat, as needed, to maintain 10 or 11 pounds of pressure.
Note: the chart at right will help you determine the right processing time and pressure, if you have a different type of canner, or are above sea level.
It is important to learn how to operate your pressure canner by reading the owner's manual that came with your particular canner. If you cannot find your owner's manual, you can obtain find one online: Here is where to find some common manufacturer's manuals:
or by contacting the company that made your canner. Give the model number
to the manufacturer, and they will send you the right manual. Click here for more information about pressure canners and a variety of models you can order.
process according to the recommendations in the table appropriate to your type of pressure canner below:
Recommended process time for Chile Con Carne in a dial-gauge pressure canner. |
||||||
|
|
Canner Pressure (PSI) at Altitudes of |
|||||
|
Style of Pack |
Jar Size |
Process Time |
0 - 2,000 ft |
2,001 - 4,000 ft |
4,001 - 6,000 ft |
6,001 - 8,000 ft |
|
Hot |
Pints |
75 min |
11 lb |
12 lb |
13 lb |
14 lb |
Recommended process time for Chile Con Carne in a weighted-gauge pressure canner. |
||||
|
|
Canner Pressure (PSI) at Altitudes of |
|||
|
Style of Pack |
Jar Size |
Process Time |
0 - 1,000 ft |
Above 1,000 ft |
|
Hot |
Pints |
75 min |
10 lb |
15 lb |
Step 16 - Turn off the heat and let it cool down
When the processing time from the chart above is up, turn off the heat, and allow the pressure canner to cool and the pressure to drop to zero before opening the canner. Let the jars cool without being jostled. After the pressure drops to zero (usually, you can tell but the "click" sound of the safety release vents opening, as well as but the gauge. Let the pressure in the canner drop to zero by itself. This may take 45 minutes in a 16-quart canner filled with jars and almost an hour in a 22-quart canner. If the vent is opened before the pressure drops to zero OR if the cooling is rushed by running cold water over the canner, liquid will be lost from the jars. Too rapid cooling causes loss of liquid in the jars!
Step 17 - Remove the jars
Lift the jars out of the water and let them cool on a wooden cutting
board or a towel, without touching or
bumping them in a draft-free place (usually takes overnight), here they
won't be bumped. You can then remove the rings if you like, but if you leave them on, at least loosen them quite a bit, so they don't rust in place due to trapped moisture. Once the jars are cool, you can check that they are sealed verifying that the lid has been sucked down. Just press in the center, gently, with your finger. If it pops up and down (often making a popping sound), it is not sealed. If you put the jar in the refrigerator right away, you can still use it. Some people replace the lid and reprocess the jar, then that's a bit iffy. If you heat the contents back up, re-jar them (with a new lid) and the full time in the canner, it's usually ok. You're done!
Illustrated Canning, Freezing, Jam Instructions and Recipes
[ Easy Home Canning Directions] [FAQs - Answers to common questions and problems] [Recommended books about home canning, jam making, drying and preserving!] [Free canning publications to download and print]


Looking for canning equipment and supplies?
Water bath canner with a jar rack
Pressure canners for gas, electric and induction stoves: Presto 23Qt or T-fal 22Qt
Canning scoop (this one is PERFECT)
Ball Blue book (most recent version)
Jars: 8oz canning jars for jams
Find Other types of farms:
Farm markets and roadside stands
Road trips and camping resources
Local Honey, apiaries, beekeepers
Consumer fraud and scams information
Home canning supplies at the best prices on the internet!
Maple Syrup Farms, sugarworks, maple syrup festivals
Environmental information and resources
Farms For Your Event for birthday parties, weddings, receptions, business meetings, retreats, etc.
Festivals - local fruit and vegetable festivals
Get the
most recent version of
the Ball Blue Book
